> ## Documentation Index
> Fetch the complete documentation index at: https://docs.gcore.com/llms.txt
> Use this file to discover all available pages before exploring further.
# Connect to Bare Metal via SSH
SSH key pairs or a password authenticate connections to Linux [Bare Metal](/cloud/bare-metal-servers/about-bare-metal-servers) servers. The public key is stored in the [Gcore Customer Portal](https://portal.gcore.com) and the private key remains on the local machine, or a password is set during server creation through a `cloud-init` script.
Before connecting, confirm that firewall rules allow incoming SSH traffic on port 22. A [Bare Metal server](/cloud/bare-metal-servers/create-a-bare-metal-server) must already exist in the target region.
Windows Bare Metal servers cannot be accessed via SSH. Connect through RDP or [console access](/cloud/virtual-instances/connect/connect-to-your-instance-via-control-panel) instead. Linux servers support SSH or the same console option.
## Connect with SSH keys
To connect with SSH keys, generate a key pair locally or in the Customer Portal, add the public key to the account, and select the key on the Bare Metal [creation form](/cloud/bare-metal-servers/create-a-bare-metal-server).
Choose one of the following ways to make an SSH key available when creating the server:
Never share a private SSH key or passphrase with third parties. Unauthorized access may compromise data stored on the server.
### Generate SSH keys locally
Generate a key pair using `ssh-keygen` on Windows 10 and later, Linux, and macOS, or with [PuTTYgen](https://www.puttygen.com) on older Windows versions. Copy the contents of the resulting `.pub` file — this is the public key to add to the account.
### Generate an SSH key in the Customer Portal
To generate a key pair directly in the portal:
1. In the [Gcore Customer Portal](https://portal.gcore.com), navigate to **Cloud** > **SSH Keys**.
2. Click **Autogenerate SSH Key**.
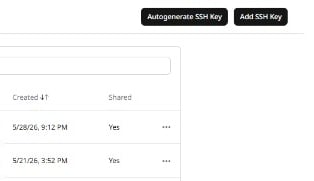 3. Enter a key name and click **Create SSH Key**. The public key is stored in the account and the private key file downloads to local storage.
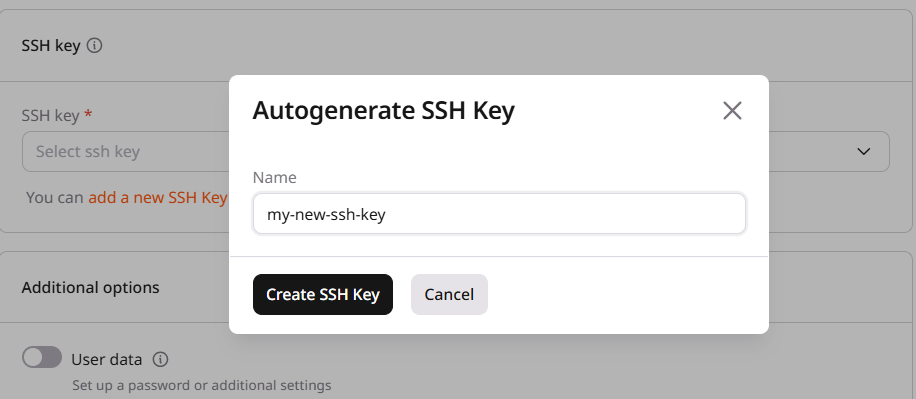 Key names can contain only Latin characters, underscores, spaces, and dots. The length must be between 3 and 63 characters.
### Add a public SSH key to the Customer Portal
If the key was generated outside the portal, add the public key manually:
1. In the Customer Portal, navigate to **Cloud** > **SSH Keys**.
2. Click **Add SSH Key**.
3. In the **SSH key content** field, paste the public key.
4. Enter a key name and click **Add SSH Key**.
Key names can contain only Latin characters, underscores, spaces, and dots. The length must be between 3 and 63 characters.
### Add a public SSH key to the Customer Portal
If the key was generated outside the portal, add the public key manually:
1. In the Customer Portal, navigate to **Cloud** > **SSH Keys**.
2. Click **Add SSH Key**.
3. In the **SSH key content** field, paste the public key.
4. Enter a key name and click **Add SSH Key**.
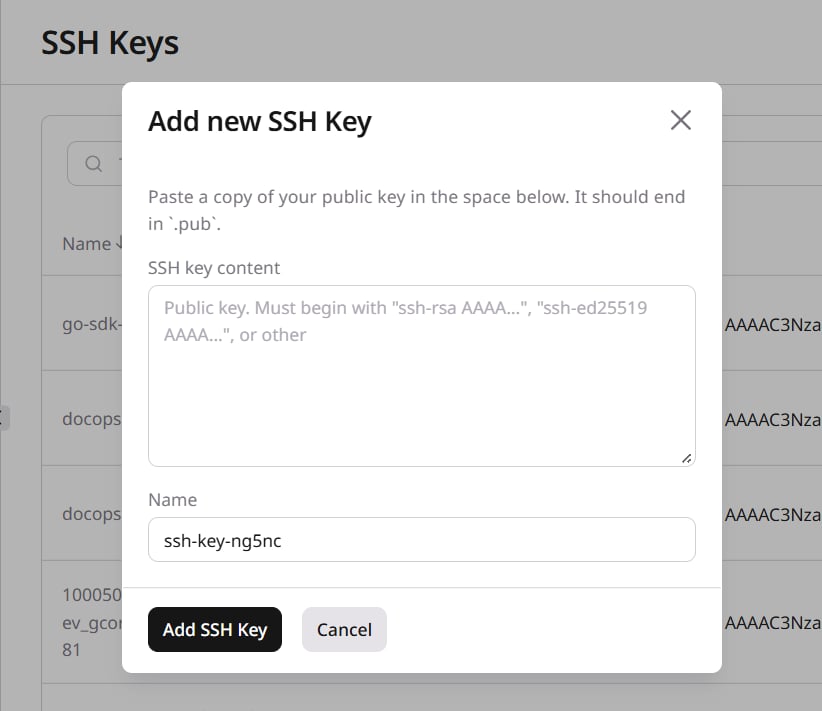 The key appears in the SSH keys list and can be selected when creating a Bare Metal server.
### Delete an SSH key
To remove a key from the account:
1. In the Customer Portal, navigate to **Cloud** > **SSH Keys**.
2. Find the key in the list and click the three-dot icon in the row.
3. Click **Delete**.
4. In the confirmation dialog, click **Delete SSH key**.
### Generate an SSH key during creation
On the Bare Metal [creation form](/cloud/bare-metal-servers/create-a-bare-metal-server), the **SSH Keys** section offers a dropdown to select an existing key and links to add or generate a new key:
* **Select SSH key** — attach a key already stored in the Customer Portal.
* **Add a new SSH key** — paste a public key generated locally.
* **Generate an SSH key** — create a new key pair in the portal.
To generate a key during creation:
1. Click **Generate an SSH key**.
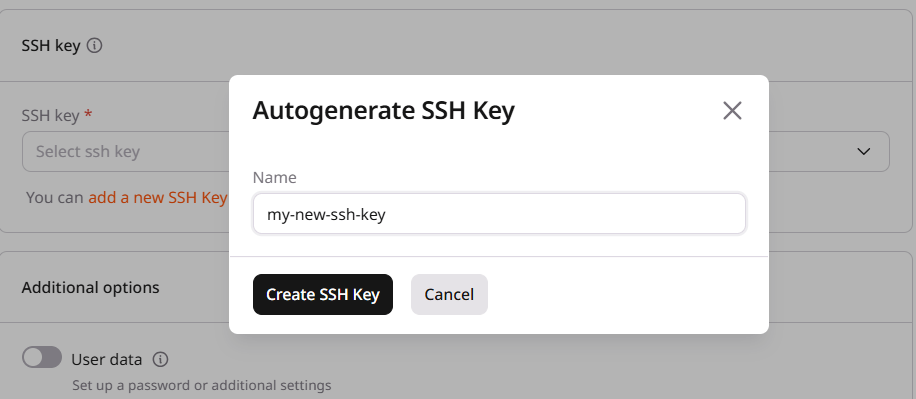
2. Enter the key name and click **Create SSH Key**. The private key file downloads to local storage and the key is attached to the server.
The key appears in the SSH keys list and can be selected when creating a Bare Metal server.
### Delete an SSH key
To remove a key from the account:
1. In the Customer Portal, navigate to **Cloud** > **SSH Keys**.
2. Find the key in the list and click the three-dot icon in the row.
3. Click **Delete**.
4. In the confirmation dialog, click **Delete SSH key**.
### Generate an SSH key during creation
On the Bare Metal [creation form](/cloud/bare-metal-servers/create-a-bare-metal-server), the **SSH Keys** section offers a dropdown to select an existing key and links to add or generate a new key:
* **Select SSH key** — attach a key already stored in the Customer Portal.
* **Add a new SSH key** — paste a public key generated locally.
* **Generate an SSH key** — create a new key pair in the portal.
To generate a key during creation:
1. Click **Generate an SSH key**.
2. Enter the key name and click **Create SSH Key**. The private key file downloads to local storage and the key is attached to the server.
 ## Connect with a password
To enable password authentication, set the password in a `cloud-init` script during Bare Metal creation:
1. In the Customer Portal, navigate to **Cloud** > **Bare Metal** and click **Create Bare Metal**.
2. In **Additional options**, select the **User data** checkbox. A text area appears for the `cloud-init` script.
## Connect with a password
To enable password authentication, set the password in a `cloud-init` script during Bare Metal creation:
1. In the Customer Portal, navigate to **Cloud** > **Bare Metal** and click **Create Bare Metal**.
2. In **Additional options**, select the **User data** checkbox. A text area appears for the `cloud-init` script.
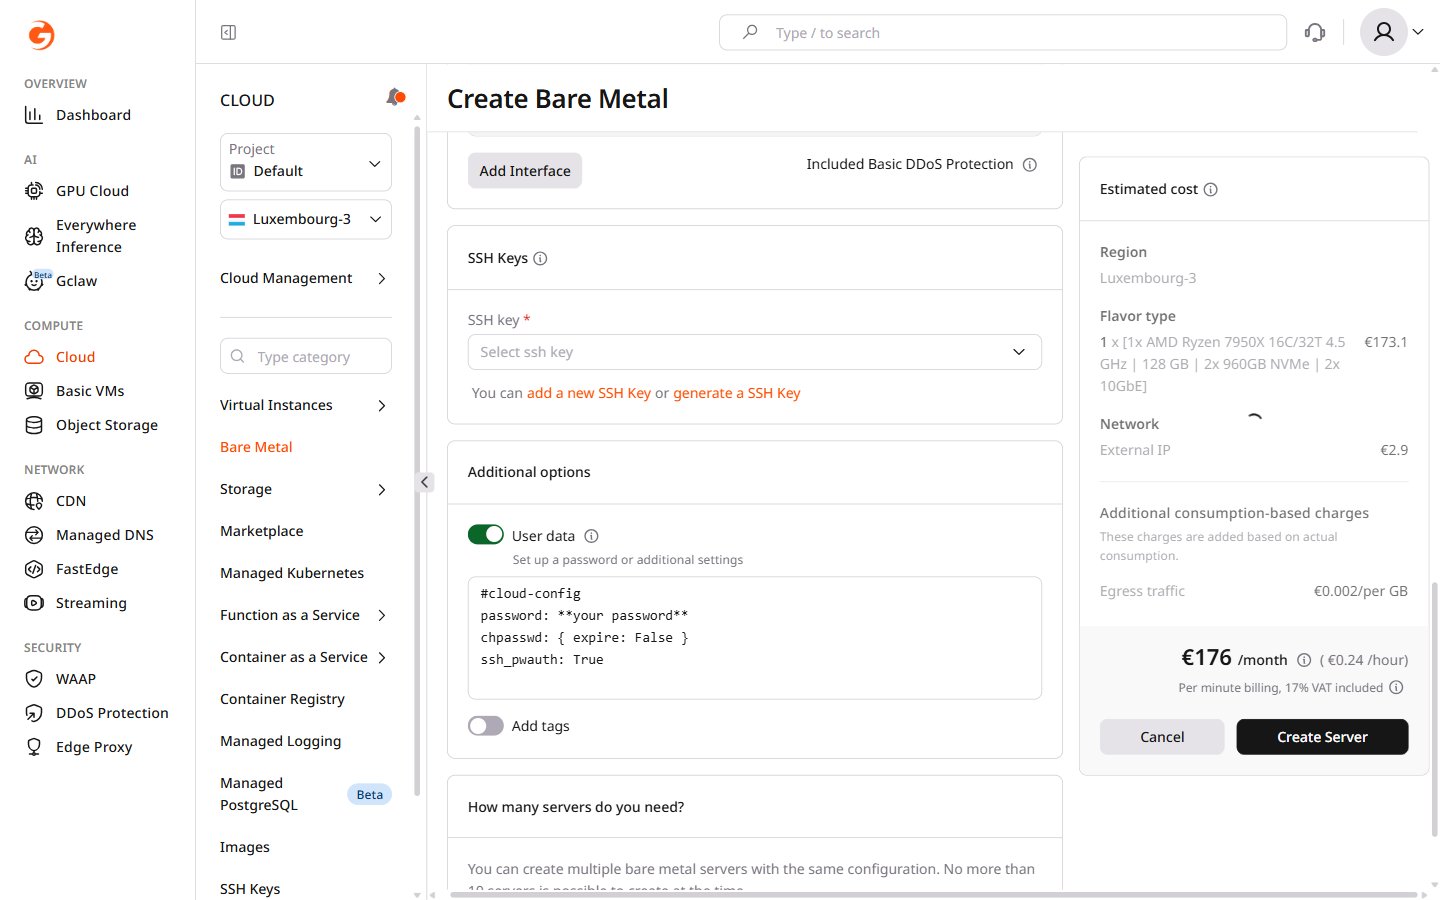 3. Paste a script that sets the password and enables SSH password authentication:
```yaml theme={null}
#cloud-config
password: your-password
chpasswd: { expire: False }
ssh_pwauth: True
```
Replace `your-password` with the desired password. The same password allows SSH login or [console access](/cloud/virtual-instances/connect/connect-to-your-instance-via-control-panel).
Instead of a plain-text password, a hashed password value can be used in the `password` field. Generate the hash with a trusted tool before adding it to the script.
## Connect via SSH
After the Bare Metal server is active, connect from a local SSH client using the server IP address, login name, and either the private key or the configured password.
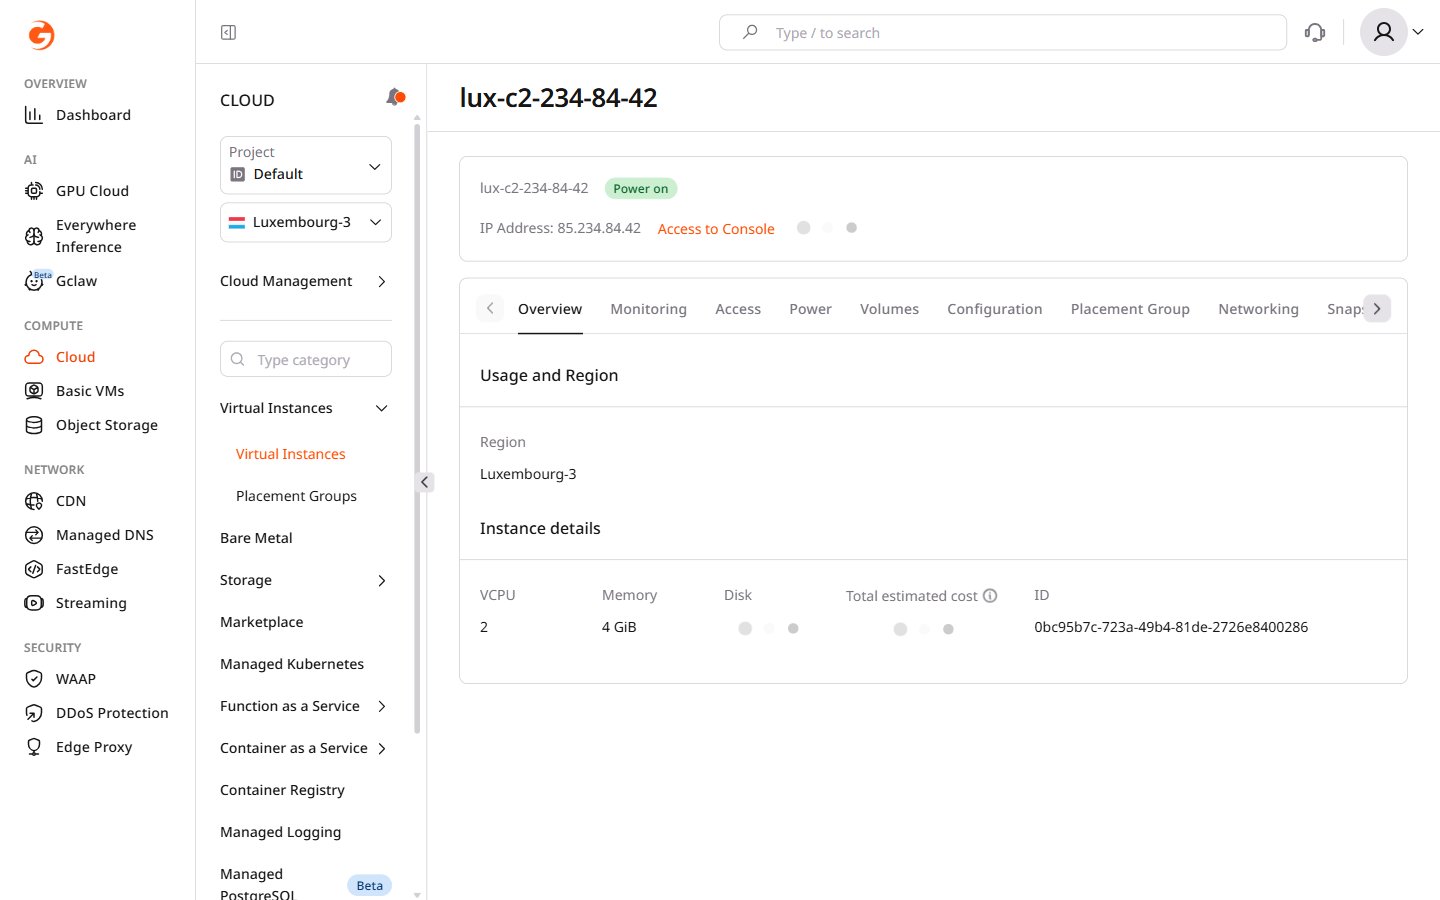
The login name and IP address appear on the server **Overview** tab next to **Access to Console** in the `username@ip-address` format.
3. Paste a script that sets the password and enables SSH password authentication:
```yaml theme={null}
#cloud-config
password: your-password
chpasswd: { expire: False }
ssh_pwauth: True
```
Replace `your-password` with the desired password. The same password allows SSH login or [console access](/cloud/virtual-instances/connect/connect-to-your-instance-via-control-panel).
Instead of a plain-text password, a hashed password value can be used in the `password` field. Generate the hash with a trusted tool before adding it to the script.
## Connect via SSH
After the Bare Metal server is active, connect from a local SSH client using the server IP address, login name, and either the private key or the configured password.
The login name and IP address appear on the server **Overview** tab next to **Access to Console** in the `username@ip-address` format.
 If the server has only a private network interface, a [floating IP](/cloud/networking/ip-address/create-and-configure-a-floating-ip-address) address is required for SSH access.
### Connect from Windows 7 or 8
Windows 7 and 8 do not include a built-in OpenSSH client. Use [PuTTY](https://putty.org) instead:
1. Download and launch PuTTY.
2. In the **Session** section, enter the server IP address in **Host Name (or IP address)**.
3. Set **Port** to `22` and **Connection type** to **SSH**.
4. (Key-based authentication only) Go to **Connection** > **SSH** > **Auth** and click **Browse** to select the private key in `.ppk` format.
If the private key is in `.pem` format, convert it to `.ppk` using [PEM to PPK](/cloud/ssh-keys/convert-an-ssh-key-from-pem-to-ppk).
5. Click **Open**.
6. When prompted for **login as**, enter the username shown on the server overview tab.
7. (Key-based authentication only) Enter the key passphrase if one was set during key generation.
### Connect from Windows 10, Linux, or macOS
Windows 10 and later include OpenSSH Client, which may need to be enabled first:
1. Open **Settings** > **Apps** > **Optional features**.
2. Find **OpenSSH Client** and click **Install** if it is not already installed.
3. Restart the computer after installation.
4. Open Command Prompt and run one of the commands below.
OpenSSH is available by default. Open Terminal and run one of the commands below.
**Password authentication:**
```sh theme={null}
ssh username@server-ip
```
**Key-based authentication:**
```sh theme={null}
ssh username@server-ip -i /path/to/private-key
```
Replace `username` with the login from the server overview tab, `server-ip` with the public or floating IP address, and `/path/to/private-key` with the path to the private key file in PEM format.
When connecting for the first time, the client asks to verify the host fingerprint. Type `yes` and press **Enter**.
For password authentication, enter the password configured in the `cloud-init` script when prompted.
If the server has only a private network interface, a [floating IP](/cloud/networking/ip-address/create-and-configure-a-floating-ip-address) address is required for SSH access.
### Connect from Windows 7 or 8
Windows 7 and 8 do not include a built-in OpenSSH client. Use [PuTTY](https://putty.org) instead:
1. Download and launch PuTTY.
2. In the **Session** section, enter the server IP address in **Host Name (or IP address)**.
3. Set **Port** to `22` and **Connection type** to **SSH**.
4. (Key-based authentication only) Go to **Connection** > **SSH** > **Auth** and click **Browse** to select the private key in `.ppk` format.
If the private key is in `.pem` format, convert it to `.ppk` using [PEM to PPK](/cloud/ssh-keys/convert-an-ssh-key-from-pem-to-ppk).
5. Click **Open**.
6. When prompted for **login as**, enter the username shown on the server overview tab.
7. (Key-based authentication only) Enter the key passphrase if one was set during key generation.
### Connect from Windows 10, Linux, or macOS
Windows 10 and later include OpenSSH Client, which may need to be enabled first:
1. Open **Settings** > **Apps** > **Optional features**.
2. Find **OpenSSH Client** and click **Install** if it is not already installed.
3. Restart the computer after installation.
4. Open Command Prompt and run one of the commands below.
OpenSSH is available by default. Open Terminal and run one of the commands below.
**Password authentication:**
```sh theme={null}
ssh username@server-ip
```
**Key-based authentication:**
```sh theme={null}
ssh username@server-ip -i /path/to/private-key
```
Replace `username` with the login from the server overview tab, `server-ip` with the public or floating IP address, and `/path/to/private-key` with the path to the private key file in PEM format.
When connecting for the first time, the client asks to verify the host fingerprint. Type `yes` and press **Enter**.
For password authentication, enter the password configured in the `cloud-init` script when prompted.