> ## Documentation Index
> Fetch the complete documentation index at: https://docs.gcore.com/llms.txt
> Use this file to discover all available pages before exploring further.
# Secure Kubernetes cluster with OpenID Connect
[OpenID Connect (OIDC)](https://openid.net/developers/how-connect-works/) authentication adds centralized access control to Kubernetes clusters, giving users single sign-on access across multiple clusters without re-entering credentials.
## Enable OIDC authentication
Enable OIDC authentication during [cluster creation](/cloud/kubernetes/clusters/create-a-kubernetes-cluster) or in the settings of an existing cluster — the configuration is the same in both cases.
To enable OIDC authentication:
1\. If creating a new cluster, scroll down and expand the **Advanced settings** section, then find the **OIDC authentication** block. For an existing cluster, open the cluster overview and click the **Advanced settings** tab.
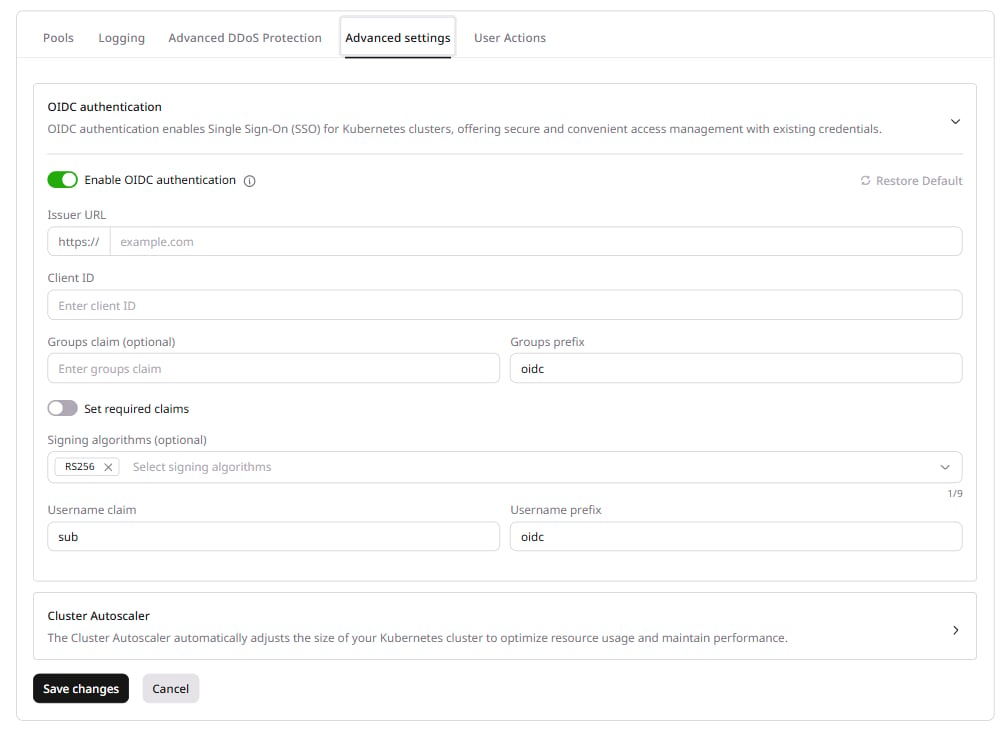
2\. Click **Enable OIDC authentication** toggle and configure the following settings:
#### Connection
* **Issuer URL**: Enter the OIDC provider domain without the protocol prefix. For Microsoft Azure AD, enter `login.microsoftonline.com`. The portal prepends `https://` automatically.
* **Client ID**: Enter a unique identifier to assign to the cluster.
 #### Identity mapping
* **Username claim**: Specify the name of the claim in the ID token that contains the username. The default value is `sub`.
* **Username prefix** (optional): Specify a prefix to prepend to the username extracted from the token. Useful to avoid naming conflicts with existing Kubernetes users. The default value is `oidc`.
* **Groups claim** (optional): Specify the name of the claim in the ID token that stores a group name. Without user groups, each user is treated independently.
* **Groups prefix** (optional): Specify a prefix to prepend to all group names from the OIDC provider. Useful to avoid naming conflicts with existing RBAC groups. The default value is `oidc`.
#### Validation
* **Set required claims** toggle: Enter any additional claims that must be present in the ID token. If a token is missing any of these claims, authentication fails.
* **Signing algorithms** (optional): Choose which cryptographic algorithms the API server should accept when verifying ID tokens. By default, tokens must be signed using the RS256 algorithm.
#### Identity mapping
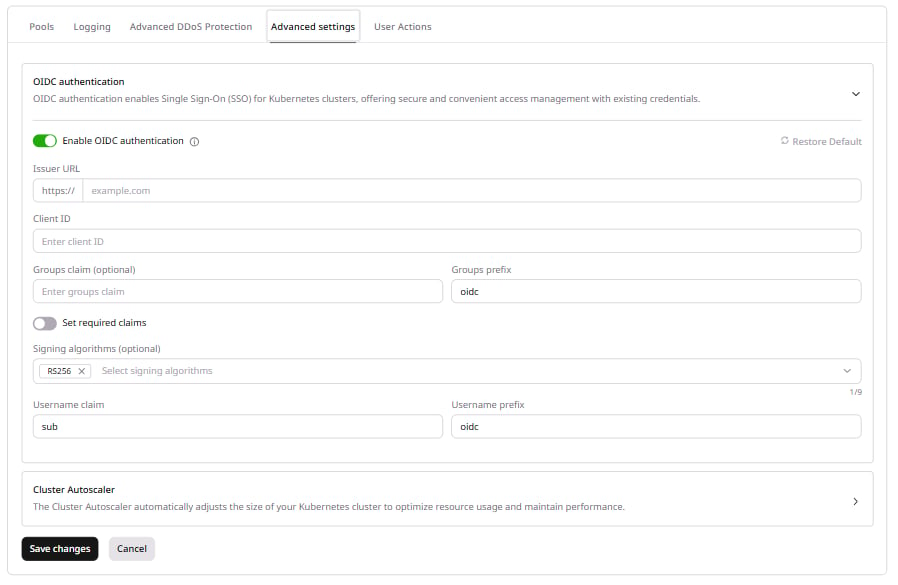
* **Username claim**: Specify the name of the claim in the ID token that contains the username. The default value is `sub`.
* **Username prefix** (optional): Specify a prefix to prepend to the username extracted from the token. Useful to avoid naming conflicts with existing Kubernetes users. The default value is `oidc`.
* **Groups claim** (optional): Specify the name of the claim in the ID token that stores a group name. Without user groups, each user is treated independently.
* **Groups prefix** (optional): Specify a prefix to prepend to all group names from the OIDC provider. Useful to avoid naming conflicts with existing RBAC groups. The default value is `oidc`.
#### Validation
* **Set required claims** toggle: Enter any additional claims that must be present in the ID token. If a token is missing any of these claims, authentication fails.
* **Signing algorithms** (optional): Choose which cryptographic algorithms the API server should accept when verifying ID tokens. By default, tokens must be signed using the RS256 algorithm.
 3\. Click **Save changes**.
OIDC authentication is now active on the cluster. Users authenticate through the configured OIDC provider.
## Disable OIDC authentication
Disabling OIDC authentication removes the current configuration. If authentication is re-enabled later, all settings must be reconfigured from scratch.
To disable OIDC authentication:
1\. In the [Gcore Customer Portal](https://portal.gcore.com), navigate to **Cloud** > **Managed Kubernetes** and click the cluster name.
2\. Open the **Advanced settings** tab and expand the **OIDC authentication** section.
3\. Disable the toggle.
3\. Click **Save changes**.
OIDC authentication is now active on the cluster. Users authenticate through the configured OIDC provider.
## Disable OIDC authentication
Disabling OIDC authentication removes the current configuration. If authentication is re-enabled later, all settings must be reconfigured from scratch.
To disable OIDC authentication:
1\. In the [Gcore Customer Portal](https://portal.gcore.com), navigate to **Cloud** > **Managed Kubernetes** and click the cluster name.
2\. Open the **Advanced settings** tab and expand the **OIDC authentication** section.
3\. Disable the toggle.
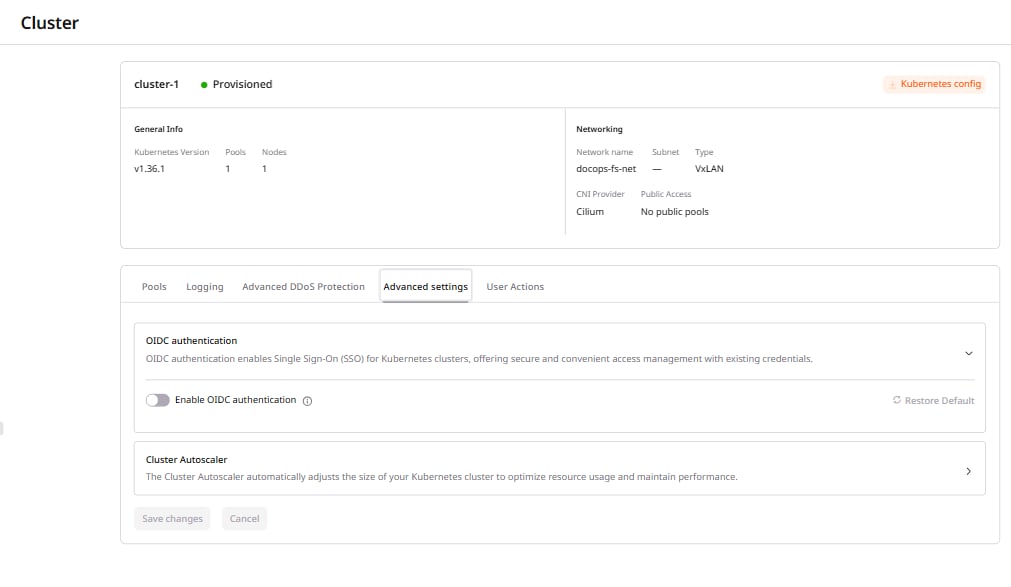 4\. Click **Save changes**.
OIDC authentication is disabled.
## Update OIDC authentication settings
Click **Restore Default** to reset all OIDC settings to their default values.
1\. In the Customer Portal, navigate to **Cloud** > **Managed Kubernetes** and click the cluster name.
2\. Open the **Advanced settings** tab and expand the **OIDC authentication** section.
3\. Adjust the settings as needed.
4\. Click **Save changes**.
The updated settings take effect immediately.
4\. Click **Save changes**.
OIDC authentication is disabled.
## Update OIDC authentication settings
Click **Restore Default** to reset all OIDC settings to their default values.
1\. In the Customer Portal, navigate to **Cloud** > **Managed Kubernetes** and click the cluster name.
2\. Open the **Advanced settings** tab and expand the **OIDC authentication** section.
3\. Adjust the settings as needed.
4\. Click **Save changes**.
The updated settings take effect immediately.