> ## Documentation Index
> Fetch the complete documentation index at: https://docs.gcore.com/llms.txt
> Use this file to discover all available pages before exploring further.
# Set up automatic snapshot creation
Snapshot Schedules automate snapshot creation for selected volumes on a recurring basis. When the **Max resource count** limit is reached, the system deletes the oldest snapshot in the schedule before creating a new one, while snapshots created outside the schedule are not affected.
## Create a snapshot schedule
At least one [volume](/cloud/virtual-instances/volumes/create-and-configure-volumes) must exist in the target region before creating a schedule.
1. In the [Gcore Customer Portal](https://portal.gcore.com), navigate to **Cloud** > **Storage** > **Snapshot Schedules**.
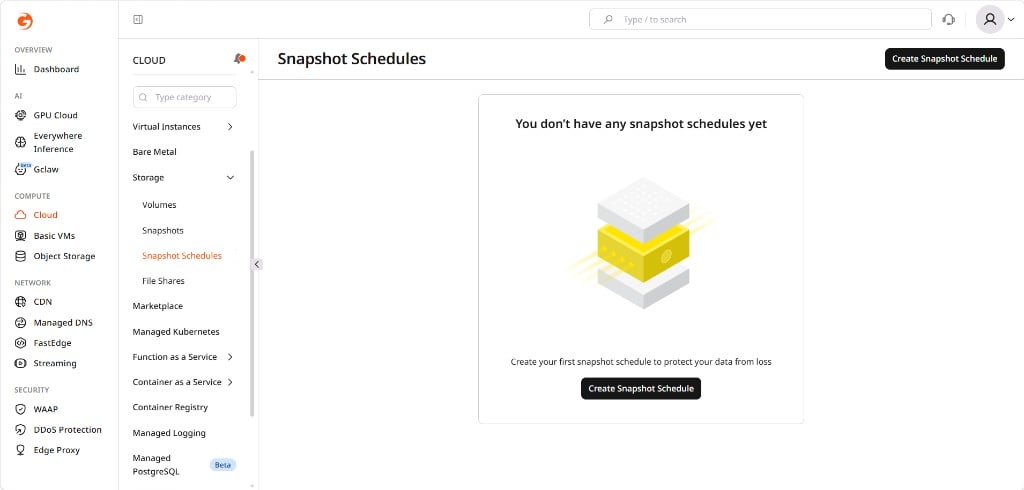 2. Click **Create Snapshot Schedule** in the page header.
3. On the **Create Snapshot Schedule** page, enter a **Schedule name**.
2. Click **Create Snapshot Schedule** in the page header.
3. On the **Create Snapshot Schedule** page, enter a **Schedule name**.
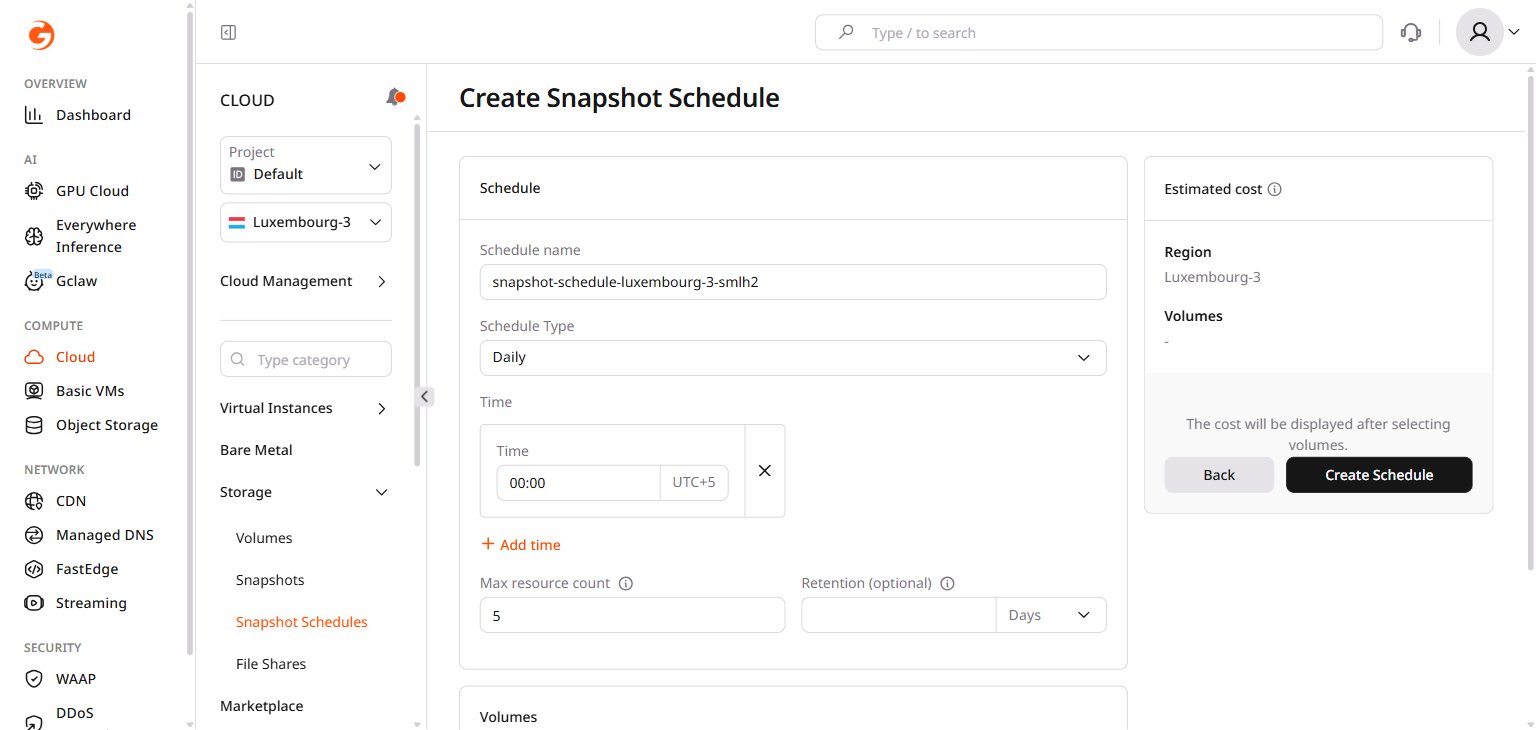 4. In the **Volumes** section, open the **Select Volumes** dropdown and select one or more volumes. Both boot and regular volumes can be included.
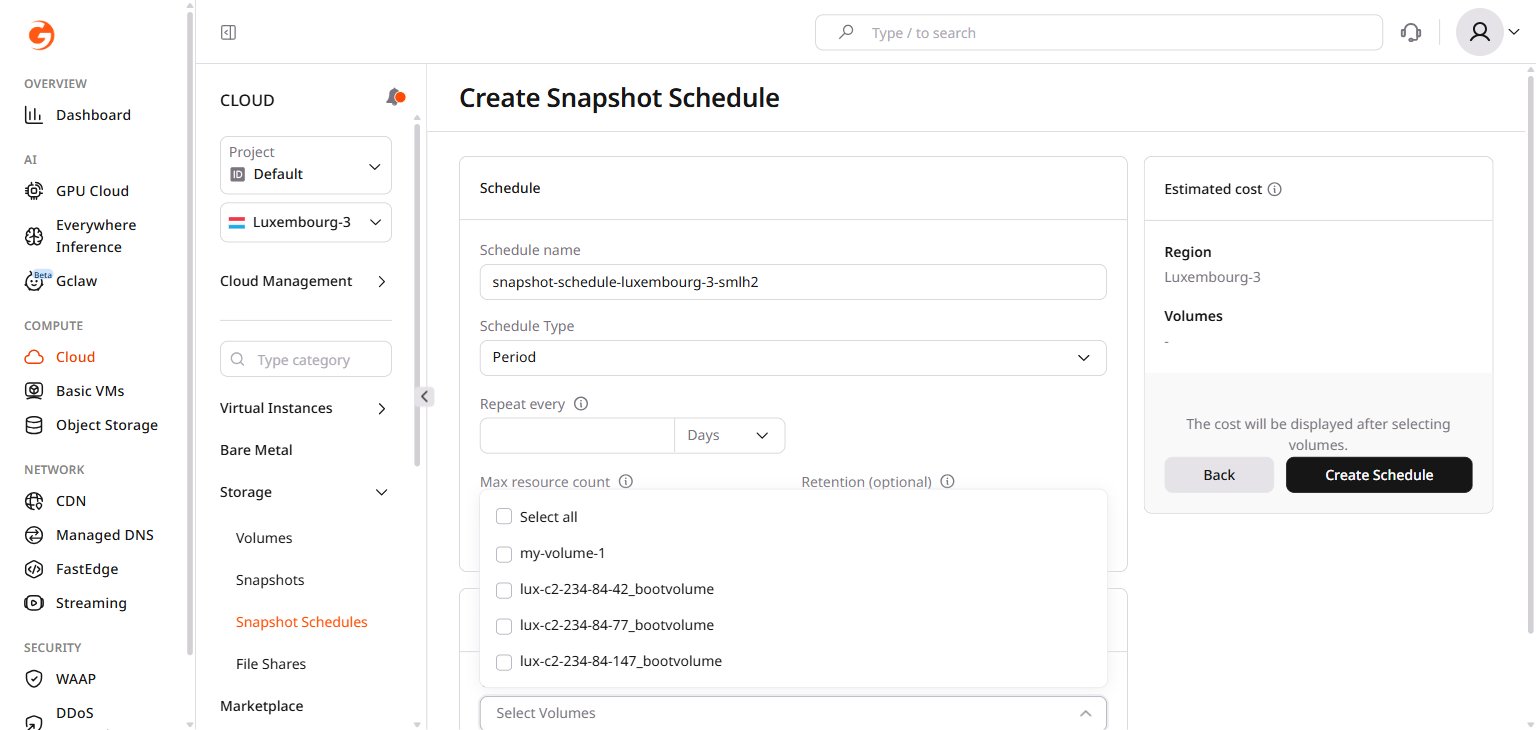 5. Select a **Schedule Type** and configure the timing fields that appear below it.
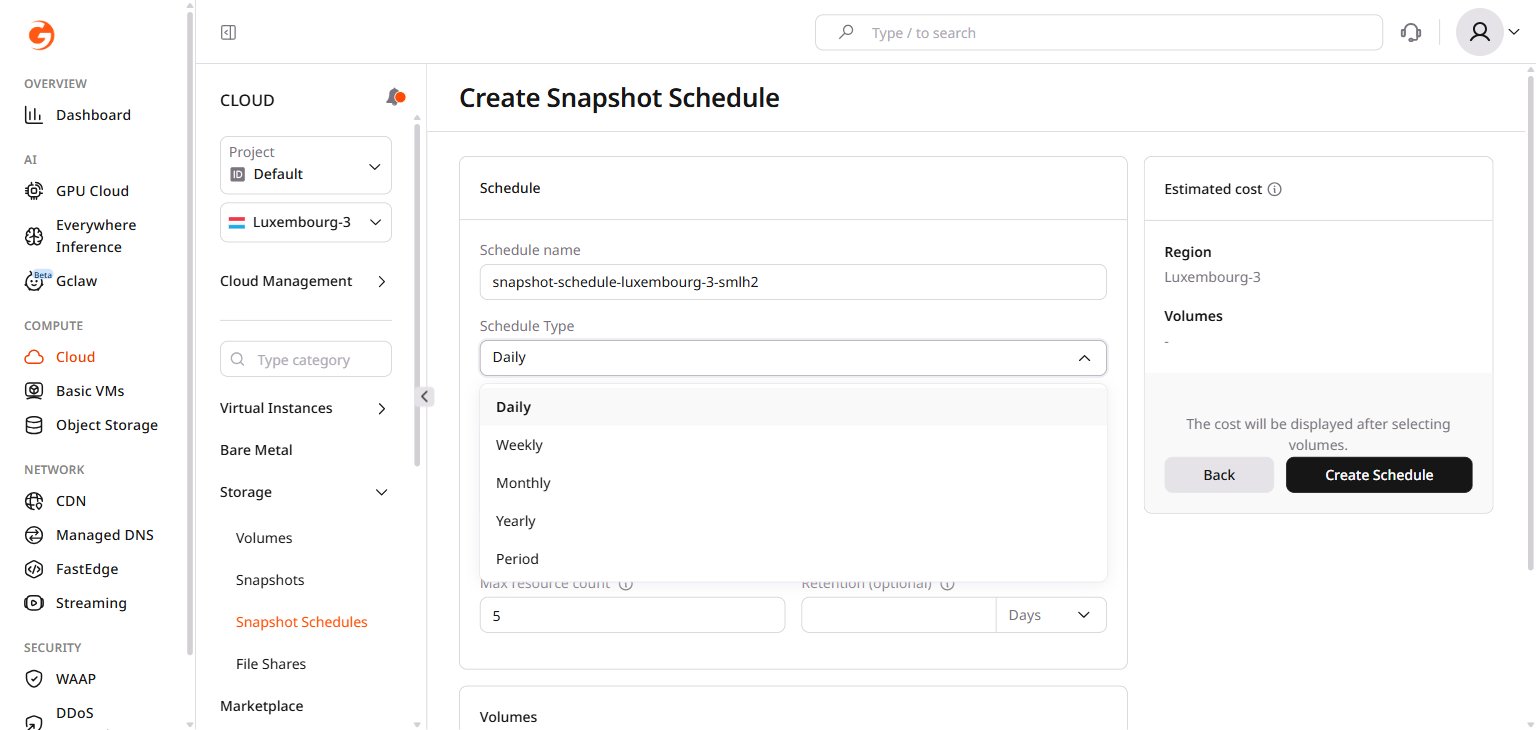 **Daily** — set one or more times of day using the **Time** field. Click **Add time** to add additional run times.
**Weekly** — select **Week Day** values and a **Time**. Multiple time rows can be added with **Add time**.
**Daily** — set one or more times of day using the **Time** field. Click **Add time** to add additional run times.
**Weekly** — select **Week Day** values and a **Time**. Multiple time rows can be added with **Add time**.
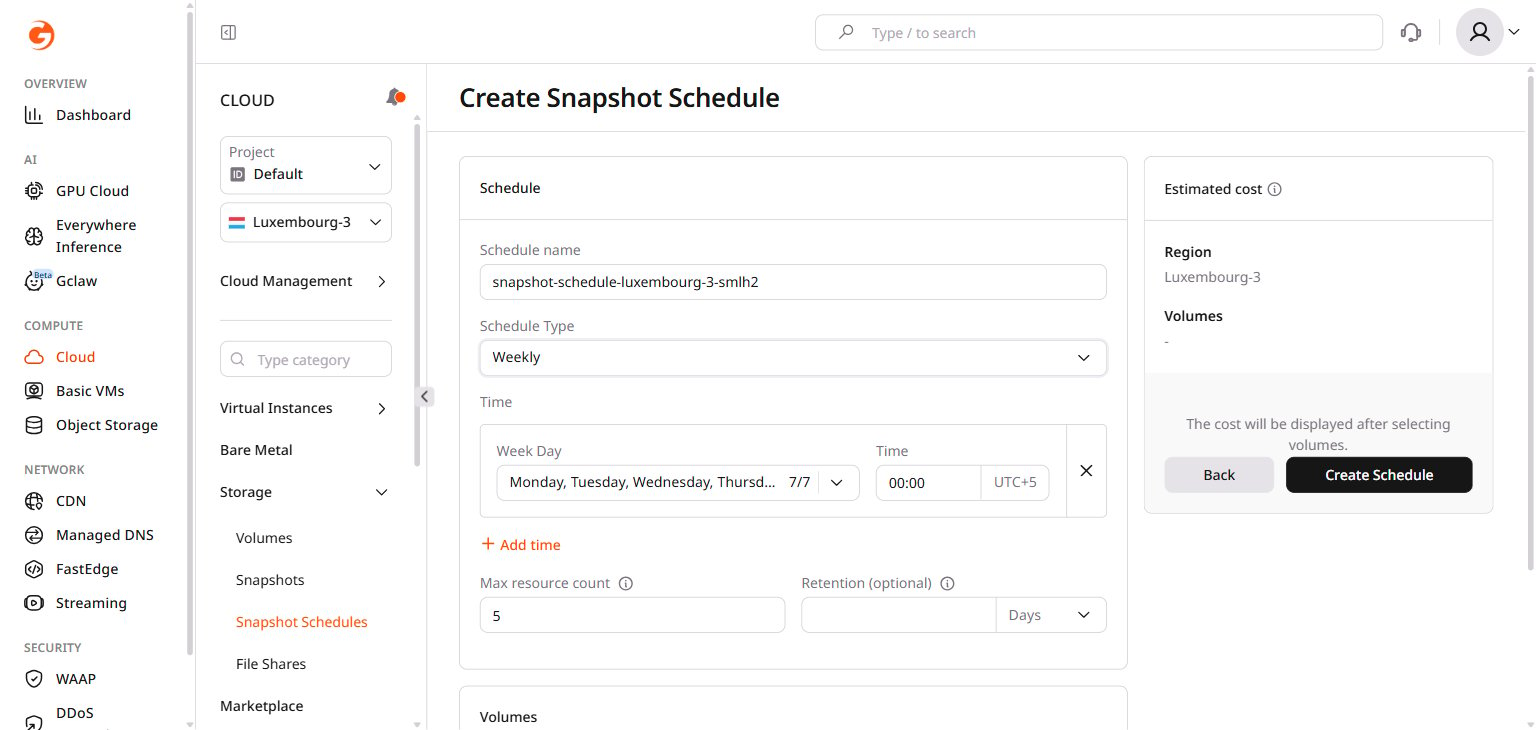 **Monthly** and **Yearly** — select the calendar values shown in the form and set a **Time**.
**Period** — in **Repeat every**, enter an interval and select the unit (for example, 7 **Days** for a weekly interval). The minimum interval is 1 hour.
**Monthly** and **Yearly** — select the calendar values shown in the form and set a **Time**.
**Period** — in **Repeat every**, enter an interval and select the unit (for example, 7 **Days** for a weekly interval). The minimum interval is 1 hour.
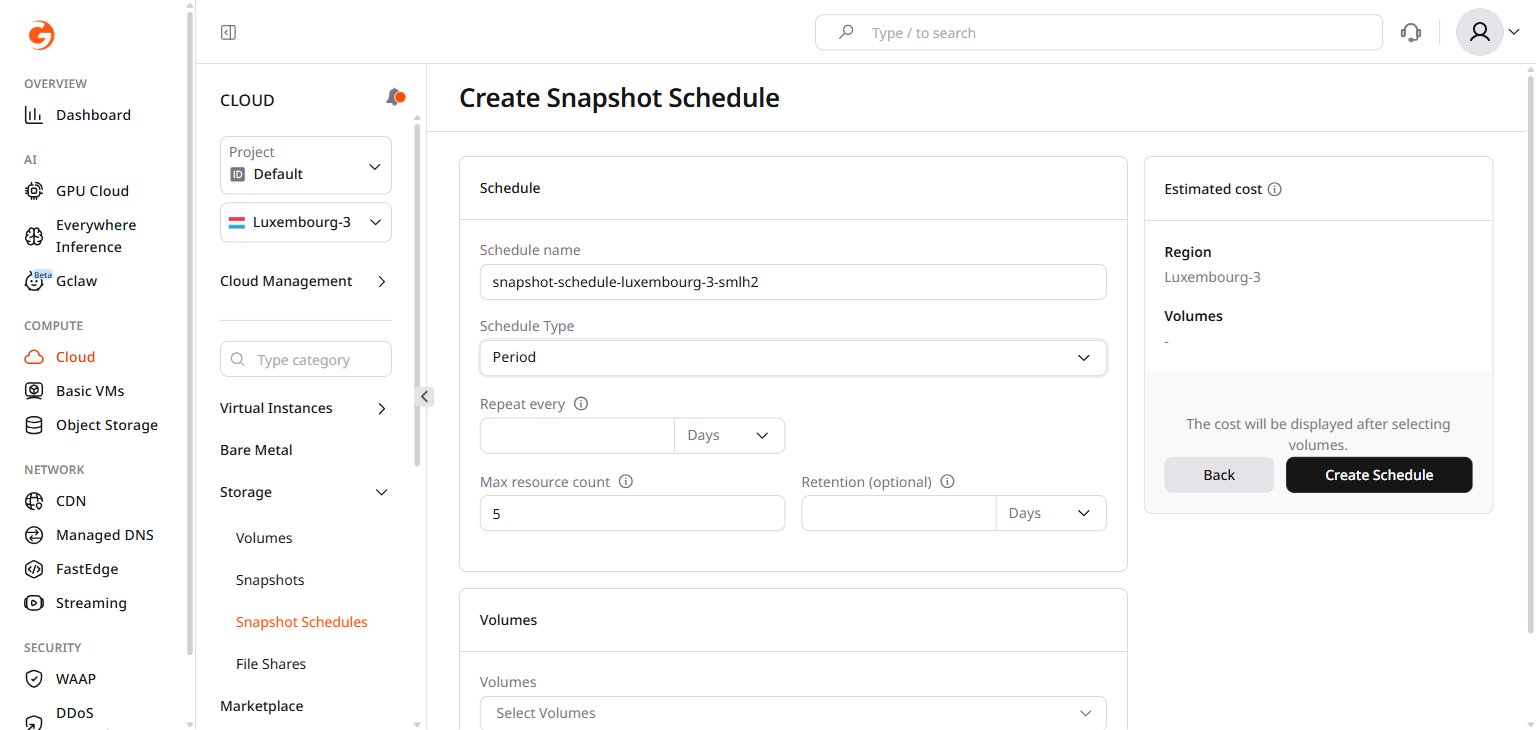 6. Set **Max resource count** — the maximum number of snapshots the schedule keeps at one time. When the limit is reached, the oldest snapshot in the schedule is deleted before a new one is created.
7. Set **Retention (optional)** — the number of days after which a snapshot is deleted. Even if retention has not expired, an older snapshot may still be removed when **Max resource count** is reached.
8. Review the **Estimated cost** panel after volumes are selected, then click **Create Schedule**.
The schedule appears on the **Snapshot Schedules** page and starts running when created.
Snapshot storage counts toward project quotas. If creation fails with a quota error, reduce existing snapshots or [Request](/cloud/getting-started/request-a-quota-increase).
## Disable and enable a schedule
1. In the Customer Portal, navigate to **Cloud** > **Storage** > **Snapshot Schedules**.
2. Click the schedule name to open its settings.
3. Use the enable/disable control at the top of the page to pause or resume the schedule, then save the changes.
When enabled, the schedule status is **Active**.
## Delete a schedule
1. In the Customer Portal, navigate to **Cloud** > **Storage** > **Snapshot Schedules**.
2. Click the three-dot icon at the end of the schedule row.
3. Select **Delete** from the menu and confirm the action.
Deleting a schedule does not delete snapshots that were already created.
6. Set **Max resource count** — the maximum number of snapshots the schedule keeps at one time. When the limit is reached, the oldest snapshot in the schedule is deleted before a new one is created.
7. Set **Retention (optional)** — the number of days after which a snapshot is deleted. Even if retention has not expired, an older snapshot may still be removed when **Max resource count** is reached.
8. Review the **Estimated cost** panel after volumes are selected, then click **Create Schedule**.
The schedule appears on the **Snapshot Schedules** page and starts running when created.
Snapshot storage counts toward project quotas. If creation fails with a quota error, reduce existing snapshots or [Request](/cloud/getting-started/request-a-quota-increase).
## Disable and enable a schedule
1. In the Customer Portal, navigate to **Cloud** > **Storage** > **Snapshot Schedules**.
2. Click the schedule name to open its settings.
3. Use the enable/disable control at the top of the page to pause or resume the schedule, then save the changes.
When enabled, the schedule status is **Active**.
## Delete a schedule
1. In the Customer Portal, navigate to **Cloud** > **Storage** > **Snapshot Schedules**.
2. Click the three-dot icon at the end of the schedule row.
3. Select **Delete** from the menu and confirm the action.
Deleting a schedule does not delete snapshots that were already created.