> ## Documentation Index
> Fetch the complete documentation index at: https://docs.gcore.com/llms.txt
> Use this file to discover all available pages before exploring further.
# Deploy a model from the Application Catalog
The [Application Catalog](/edge-ai/everywhere-inference/application-catalog) provides pre-built open-source AI models that you can deploy without building or configuring a container image.
[Request a quota increase](/edge-ai/everywhere-inference/quotas/request-quota-increase) if the account quota is insufficient for the selected flavor.
## Create a deployment
Complete the following steps to select an application, configure compute resources, and deploy the model.
### Step 1. Open the Create Deployment form
There are two ways to open the **Create Deployment** form:
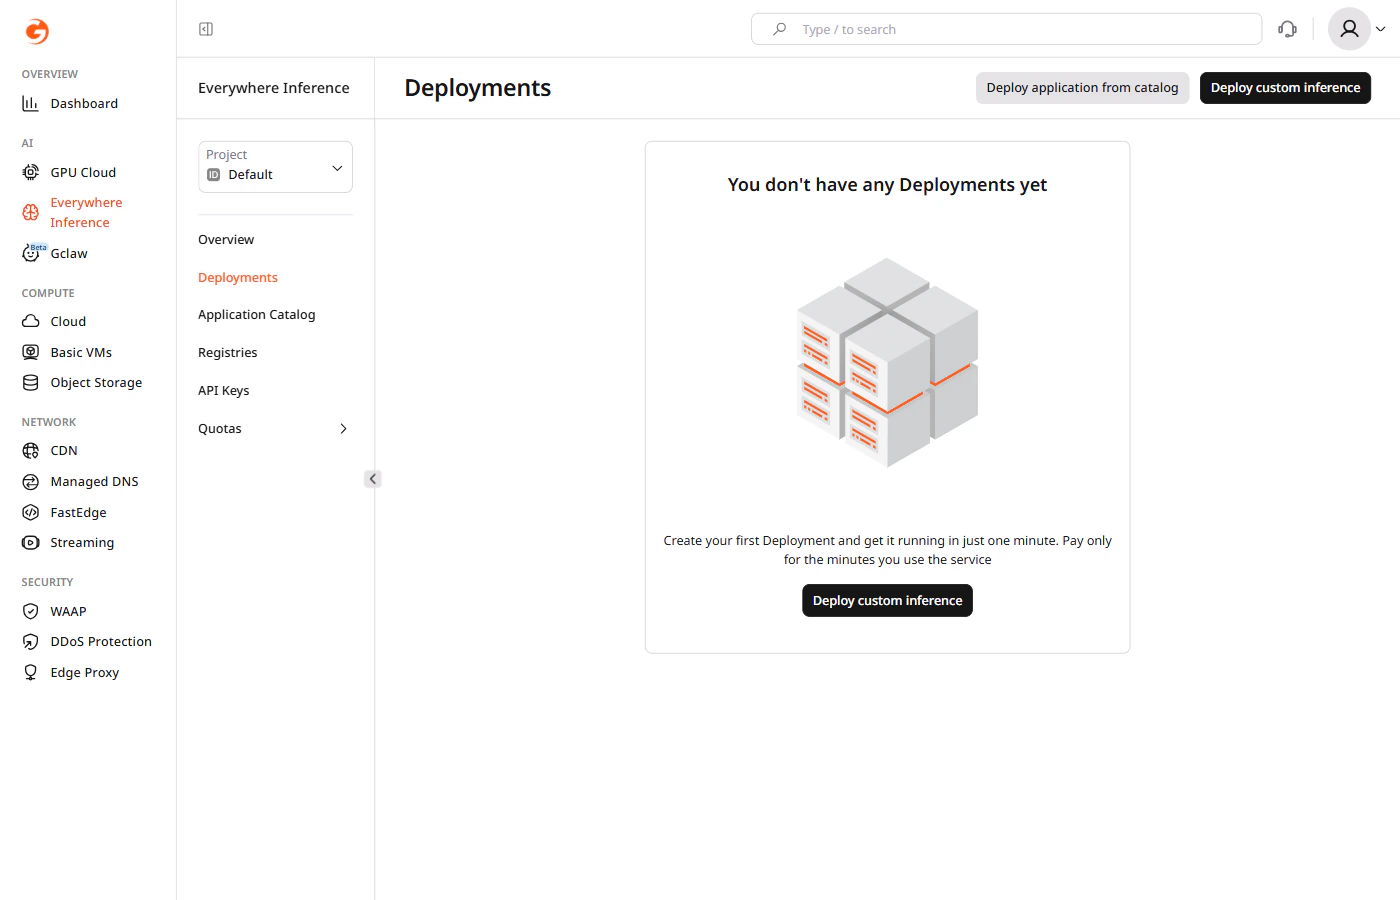
* Navigate to **Everywhere Inference** > **Deployments** and click **Deploy application from catalog**.
* Open a model detail page in the Application Catalog and click **Deploy Application**. The form opens with the selected model pre-filled.
 ### Step 2. Select an application
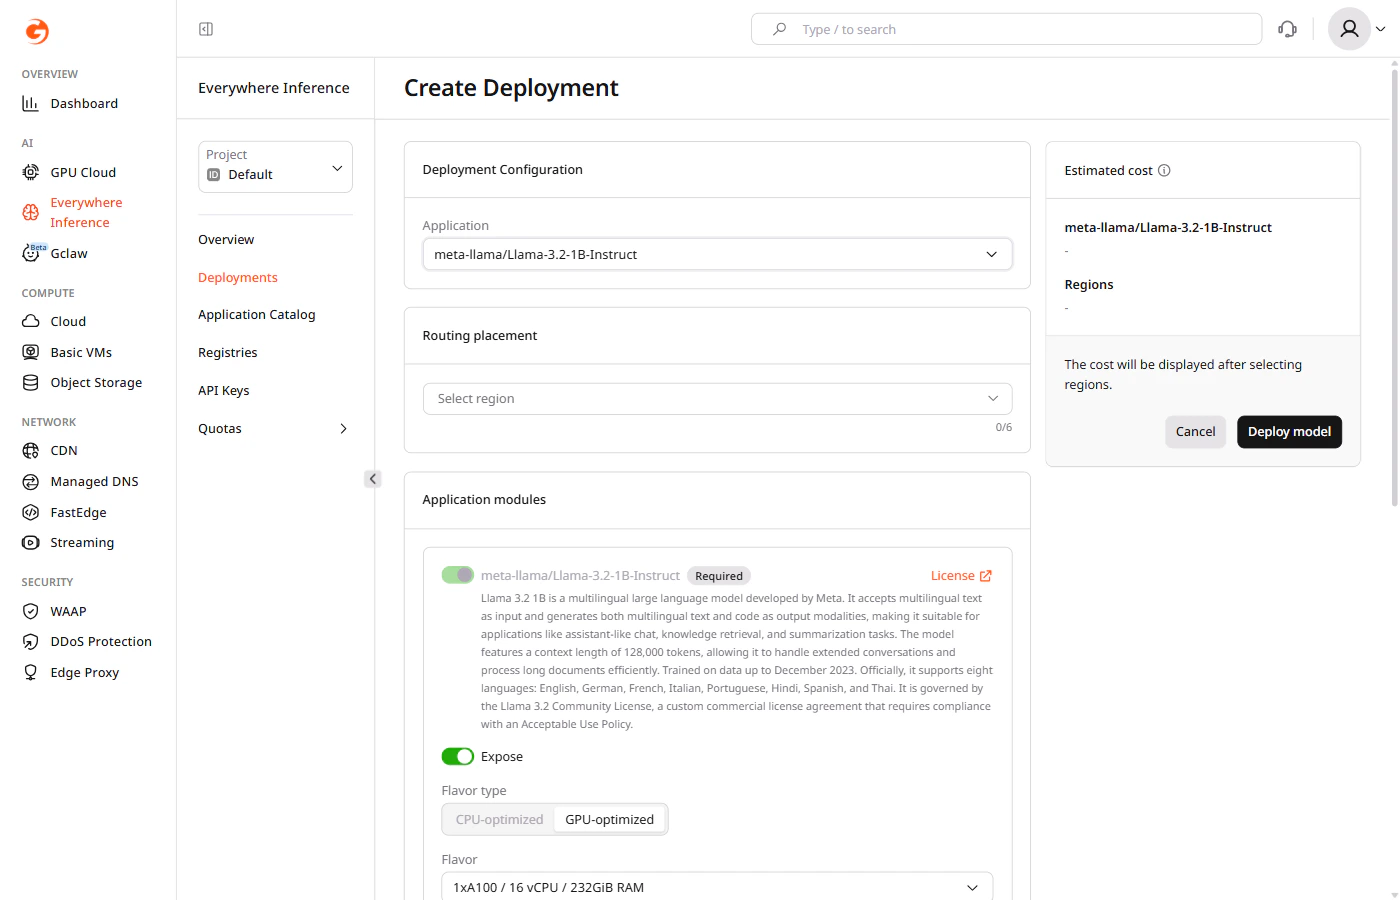
Under **Deployment Configuration**, click the **Application** dropdown and select the model to deploy.
### Step 2. Select an application
Under **Deployment Configuration**, click the **Application** dropdown and select the model to deploy.
 ### Step 3. Select regions
Under **Routing placement**, click **Select region** and select up to six regions where the model will run.
### Step 4. Configure application modules
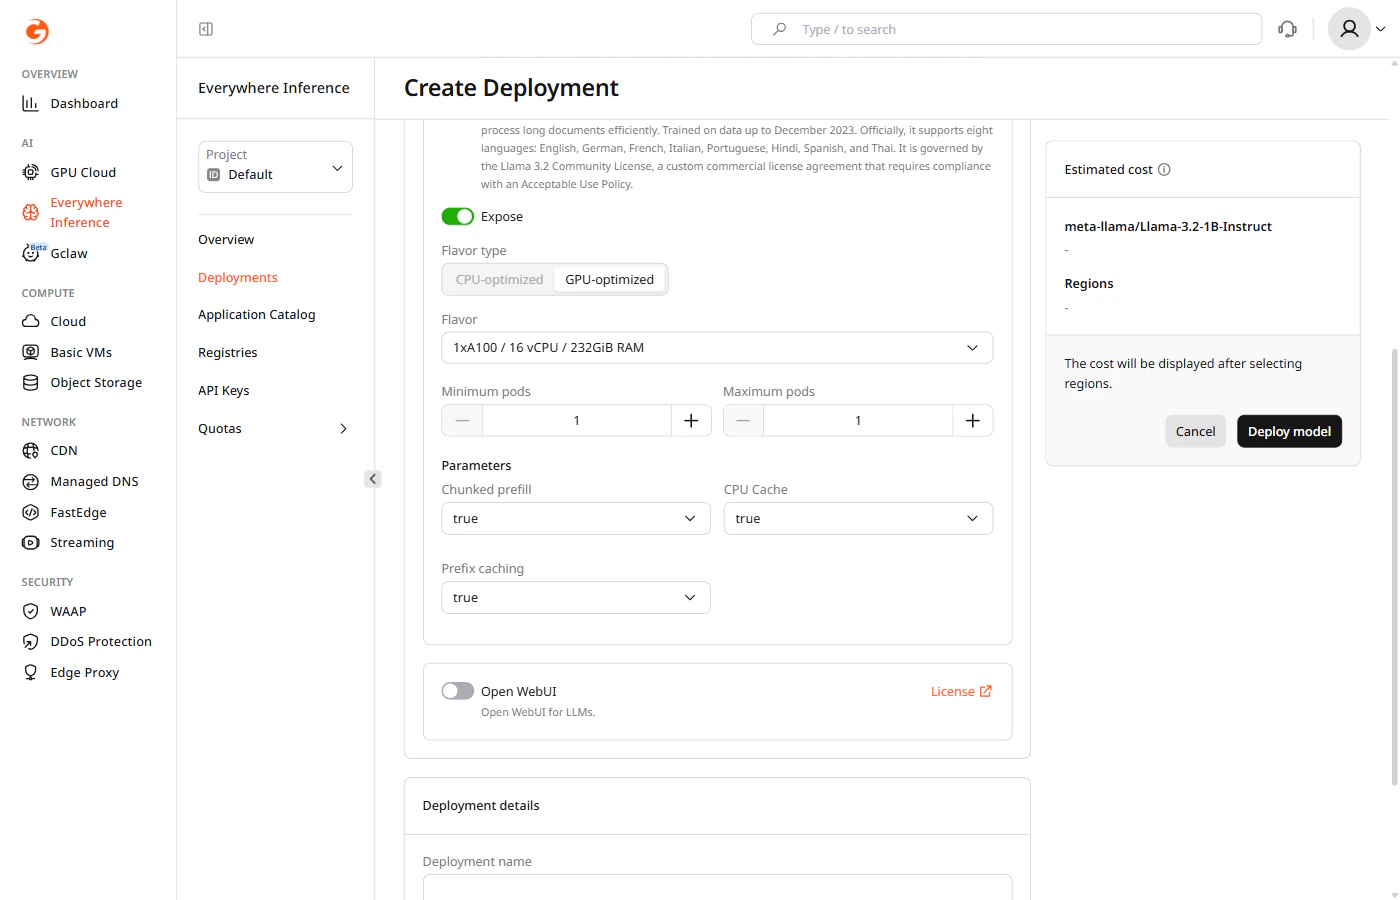
Under **Application modules**, configure the main module:
* **Expose** — controls whether the module endpoint is publicly accessible. Enabled by default.
* **Flavor type** — select **CPU-optimized** or **GPU-optimized** depending on the model requirements.
* **Flavor** — select the hardware configuration from the dropdown.
* **Minimum pods** — the minimum number of pods to keep running during low-traffic periods.
* **Maximum pods** — the maximum number of pods Gcore provisions during peak traffic.
Under **Parameters**, adjust inference settings for the model:
* **Chunked prefill** — splits long prompts into smaller chunks for processing. Default: `true`.
* **CPU Cache** — caches KV tensors in CPU memory when GPU memory is full. Default: `true`.
* **Prefix caching** — reuses cached KV state for repeated prompt prefixes. Default: `true`.
### Step 3. Select regions
Under **Routing placement**, click **Select region** and select up to six regions where the model will run.
### Step 4. Configure application modules
Under **Application modules**, configure the main module:
* **Expose** — controls whether the module endpoint is publicly accessible. Enabled by default.
* **Flavor type** — select **CPU-optimized** or **GPU-optimized** depending on the model requirements.
* **Flavor** — select the hardware configuration from the dropdown.
* **Minimum pods** — the minimum number of pods to keep running during low-traffic periods.
* **Maximum pods** — the maximum number of pods Gcore provisions during peak traffic.
Under **Parameters**, adjust inference settings for the model:
* **Chunked prefill** — splits long prompts into smaller chunks for processing. Default: `true`.
* **CPU Cache** — caches KV tensors in CPU memory when GPU memory is full. Default: `true`.
* **Prefix caching** — reuses cached KV state for repeated prompt prefixes. Default: `true`.
 The main application module cannot be removed.
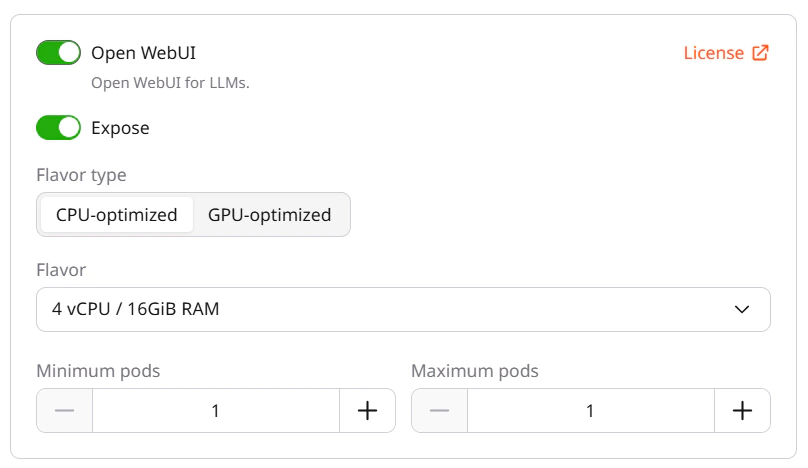
Some models include optional modules listed below the main module card. **Open WebUI** is a browser-based chat interface that lets users interact with the deployed model without writing code. To enable it, toggle it on.
When enabled, Open WebUI runs as a separate module with its own compute settings:
* **Expose** — controls whether the Open WebUI endpoint is publicly accessible.
* **Flavor type** — select **CPU-optimized** or **GPU-optimized**.
* **Flavor** — select the hardware configuration for the Open WebUI module.
* **Minimum pods** and **Maximum pods** — set the pod scaling range for the module.
The main application module cannot be removed.
Some models include optional modules listed below the main module card. **Open WebUI** is a browser-based chat interface that lets users interact with the deployed model without writing code. To enable it, toggle it on.
When enabled, Open WebUI runs as a separate module with its own compute settings:
* **Expose** — controls whether the Open WebUI endpoint is publicly accessible.
* **Flavor type** — select **CPU-optimized** or **GPU-optimized**.
* **Flavor** — select the hardware configuration for the Open WebUI module.
* **Minimum pods** and **Maximum pods** — set the pod scaling range for the module.
 Each enabled module consumes one inference instance from the quota.
### Step 5. Name the deployment
Under **Deployment details**, enter a name for the deployment. Use only letters and numbers — hyphens are not allowed in deployment names.
### Step 6. Set additional options
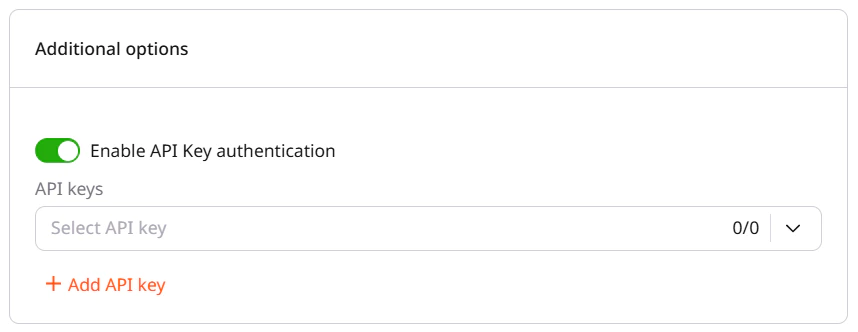
(Optional) Enable the **Enable API Key authentication** toggle to restrict access using [API keys](/edge-ai/everywhere-inference/api-keys/create-inference-deployment-with-auth).
Each enabled module consumes one inference instance from the quota.
### Step 5. Name the deployment
Under **Deployment details**, enter a name for the deployment. Use only letters and numbers — hyphens are not allowed in deployment names.
### Step 6. Set additional options
(Optional) Enable the **Enable API Key authentication** toggle to restrict access using [API keys](/edge-ai/everywhere-inference/api-keys/create-inference-deployment-with-auth).
 ### Step 7. Deploy
Review the estimated cost in the right panel, then click **Deploy model**.
Gcore creates the deployment and opens the **Deployments** page, where the deployment status is visible.
## Deployment status
The new deployment appears on the **Deployments** page with a **Deploying** status. Once all pods are running, the status changes to **Active**.
The endpoint URL becomes available on the deployment detail page. Use it to send inference requests as described in [Query a deployed model](/edge-ai/everywhere-inference/ai-models/query-deployed-model).
Logs, compute settings, and other deployment options are available on the [deployment detail page](/edge-ai/everywhere-inference/ai-models/manage-ai-model-deployments).
### Step 7. Deploy
Review the estimated cost in the right panel, then click **Deploy model**.
Gcore creates the deployment and opens the **Deployments** page, where the deployment status is visible.
## Deployment status
The new deployment appears on the **Deployments** page with a **Deploying** status. Once all pods are running, the status changes to **Active**.
The endpoint URL becomes available on the deployment detail page. Use it to send inference requests as described in [Query a deployed model](/edge-ai/everywhere-inference/ai-models/query-deployed-model).
Logs, compute settings, and other deployment options are available on the [deployment detail page](/edge-ai/everywhere-inference/ai-models/manage-ai-model-deployments).