> ## Documentation Index
> Fetch the complete documentation index at: https://docs.gcore.com/llms.txt
> Use this file to discover all available pages before exploring further.
# Manage Edge Proxy
Once created, a proxy can be reconfigured or deleted, and traffic statistics are available in real time from the [Gcore Customer Portal](https://portal.gcore.com/).
## Protected IPs
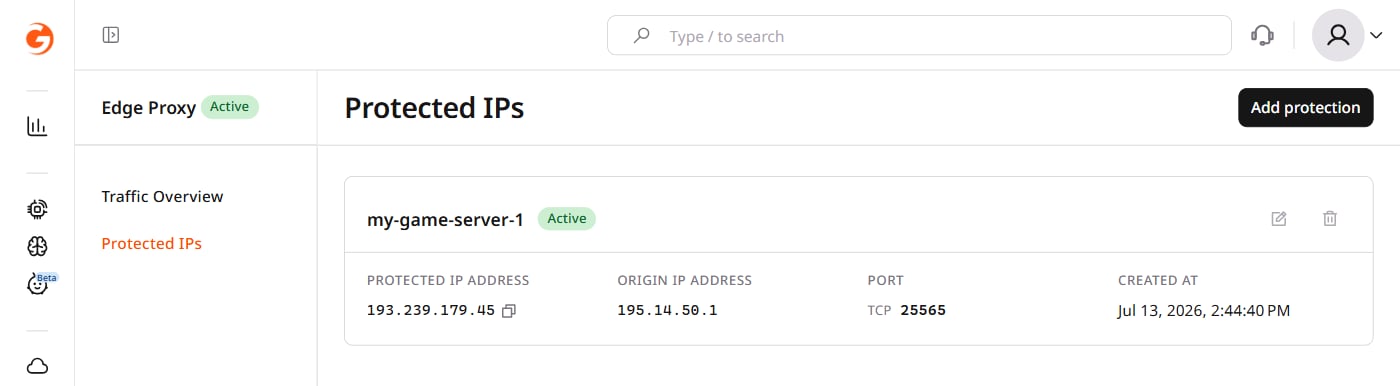
Navigate to **Security → Edge Proxy → Protected IPs** to view all configured proxies.
The list shows each proxy's name, status, protected IP address, origin IP address, port and protocol, and creation date.
 ### Edit a proxy
To rename a proxy or change its port mappings, click **Edit protection** next to the proxy.
### Edit a proxy
To rename a proxy or change its port mappings, click **Edit protection** next to the proxy.
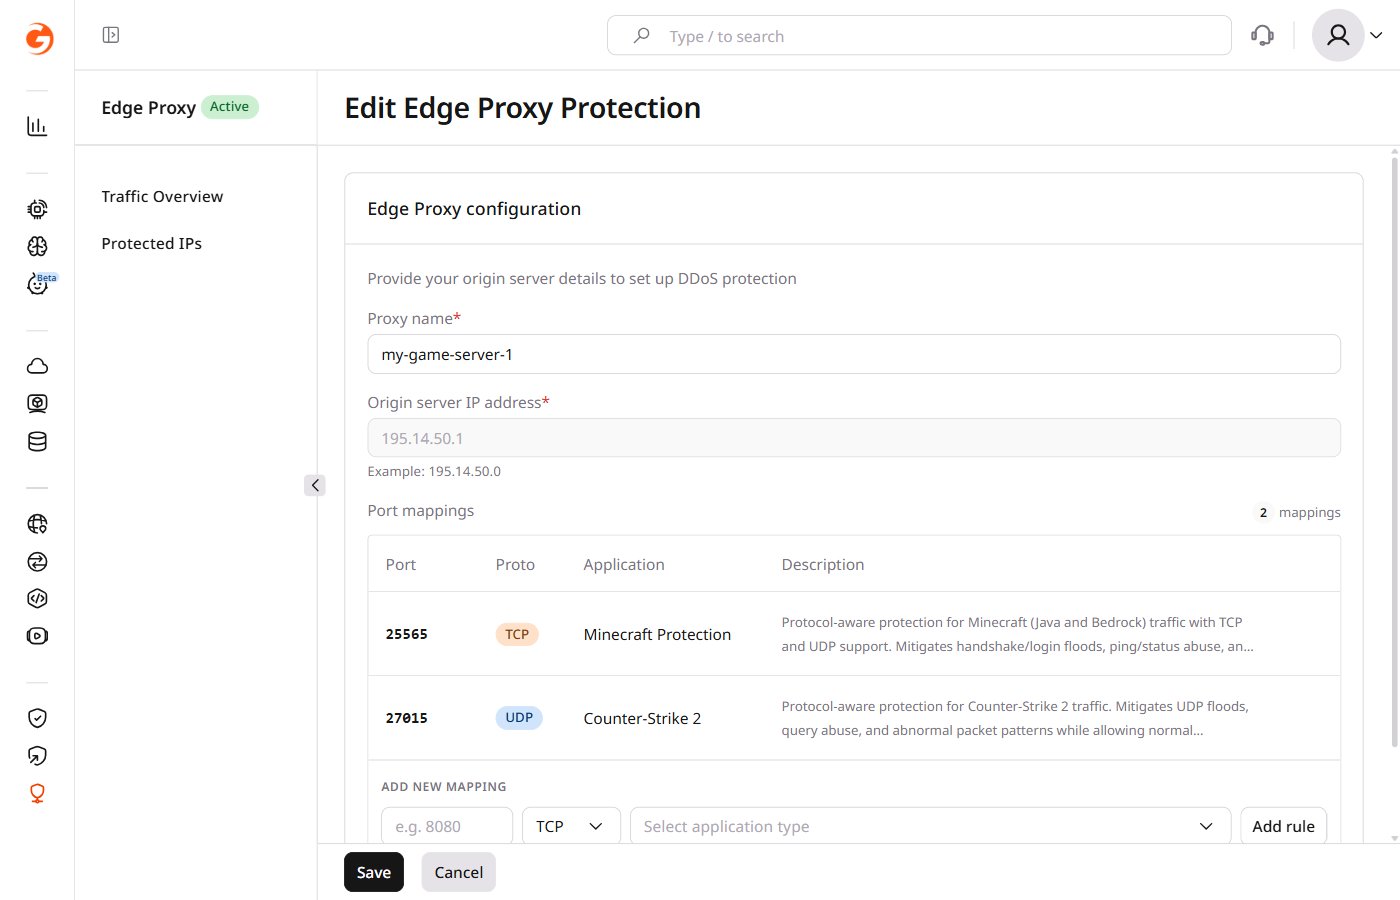 * Change the **proxy name**
* Add port mappings — click **Add rule** after filling in the port, protocol, and application type
* Remove port mappings — click the remove icon on the mapping row
The **origin server IP address** cannot be changed after creation. To use a different origin IP, delete the proxy and create a new one.
Click **Save** to apply the changes.
### Delete a proxy
Click **Delete protection** next to the proxy and confirm the action in the dialog. Deleting a proxy stops all traffic forwarding immediately. Clients connecting to the protected IP will lose access.
## Monitor traffic
Traffic Overview (**Security → Edge Proxy → Traffic Overview**) displays aggregated traffic across all active proxies.
* Change the **proxy name**
* Add port mappings — click **Add rule** after filling in the port, protocol, and application type
* Remove port mappings — click the remove icon on the mapping row
The **origin server IP address** cannot be changed after creation. To use a different origin IP, delete the proxy and create a new one.
Click **Save** to apply the changes.
### Delete a proxy
Click **Delete protection** next to the proxy and confirm the action in the dialog. Deleting a proxy stops all traffic forwarding immediately. Clients connecting to the protected IP will lose access.
## Monitor traffic
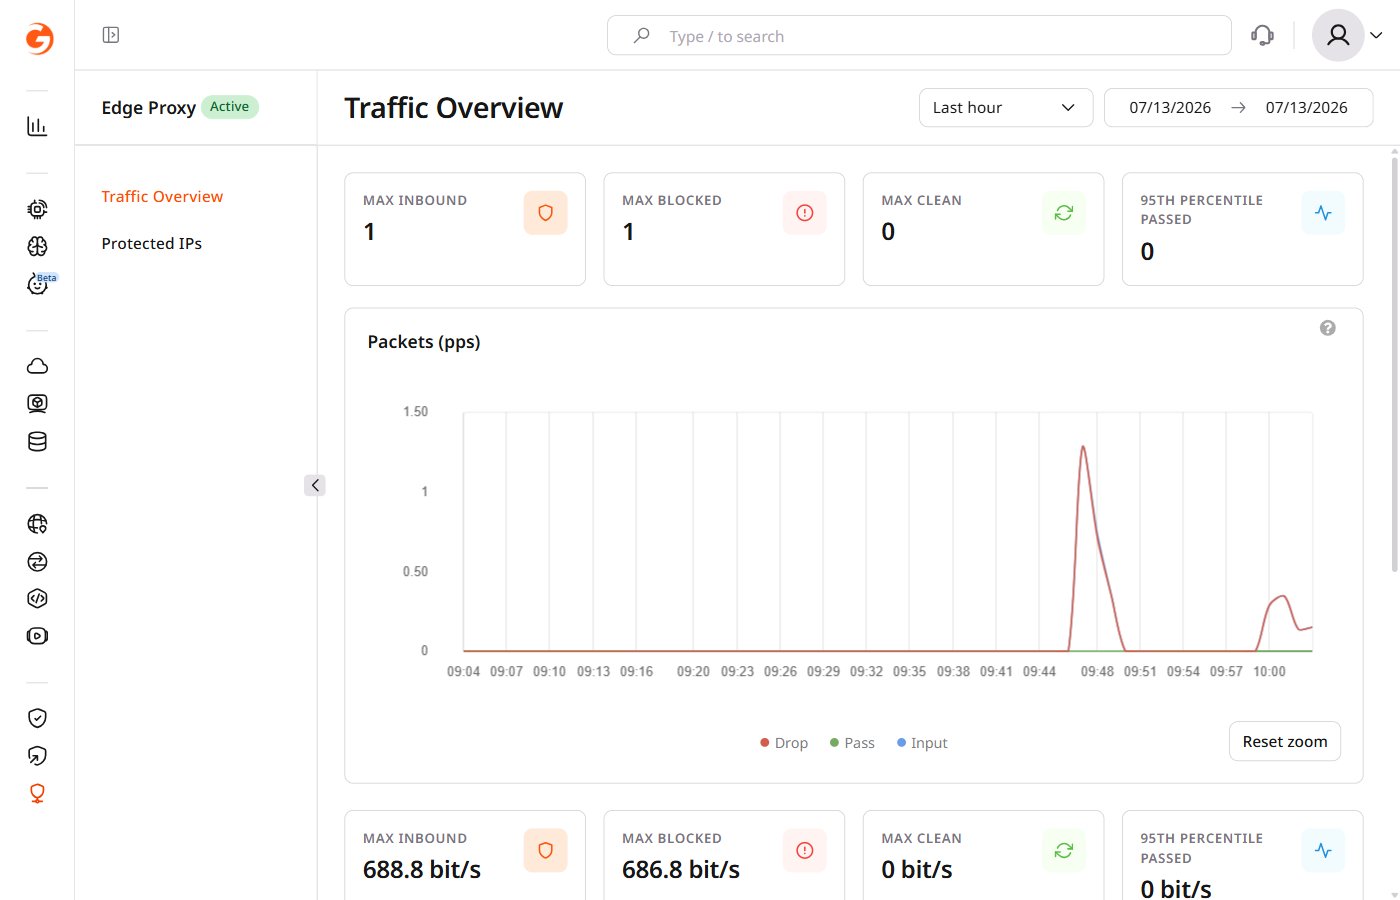
Traffic Overview (**Security → Edge Proxy → Traffic Overview**) displays aggregated traffic across all active proxies.
 ### Metrics
The page shows four metrics for packets (pps) and bits (bps):
| Metric | Description |
| -------------------------- | --------------------------------------------------------------- |
| **MAX INBOUND** | Maximum total traffic received at the Edge Proxy endpoint |
| **MAX BLOCKED** | Maximum traffic identified as malicious and dropped |
| **MAX CLEAN** | Maximum clean traffic forwarded to the origin server |
| **95TH PERCENTILE PASSED** | 95th percentile of traffic forwarded during the selected period |
### Charts
The page includes two charts:
* **Packets (pps)** — traffic measured in packets per second
* **Bits (bps)** — traffic measured in bits per second
Each chart plots three series:
* **Input** — all traffic received at the Edge Proxy endpoint
* **Drop** — traffic blocked by the DDoS filter
* **Pass** — clean traffic forwarded to the origin server
Click a series label to show or hide it. Click and drag on the chart to zoom into a time interval. Click **Reset zoom** to return to the full view.
### Time range
Use the dropdown to select a preset range: Last hour, Last 4 hours, Last 8 hours, Last 24 hours, Last 48 hours, Last week, Last month, or Last 3 months. Set a custom range using the date fields next to the dropdown.
### Metrics
The page shows four metrics for packets (pps) and bits (bps):
| Metric | Description |
| -------------------------- | --------------------------------------------------------------- |
| **MAX INBOUND** | Maximum total traffic received at the Edge Proxy endpoint |
| **MAX BLOCKED** | Maximum traffic identified as malicious and dropped |
| **MAX CLEAN** | Maximum clean traffic forwarded to the origin server |
| **95TH PERCENTILE PASSED** | 95th percentile of traffic forwarded during the selected period |
### Charts
The page includes two charts:
* **Packets (pps)** — traffic measured in packets per second
* **Bits (bps)** — traffic measured in bits per second
Each chart plots three series:
* **Input** — all traffic received at the Edge Proxy endpoint
* **Drop** — traffic blocked by the DDoS filter
* **Pass** — clean traffic forwarded to the origin server
Click a series label to show or hide it. Click and drag on the chart to zoom into a time interval. Click **Reset zoom** to return to the full view.
### Time range
Use the dropdown to select a preset range: Last hour, Last 4 hours, Last 8 hours, Last 24 hours, Last 48 hours, Last week, Last month, or Last 3 months. Set a custom range using the date fields next to the dropdown.