> ## Documentation Index
> Fetch the complete documentation index at: https://docs.gcore.com/llms.txt
> Use this file to discover all available pages before exploring further.

# Create and manage templates

export const MethodSection = ({children}) => children ?? null;

export const MethodSwitch = ({children}) => {
  const tabs = React.Children.toArray(children).map(c => {
    if (!c || !c.props) return null;
    if (c.props.id) return c;
    const inner = c.props.children;
    if (inner && inner.props && inner.props.id) return inner;
    return null;
  }).filter(Boolean);
  const firstId = tabs.length > 0 ? tabs[0].props.id : "";
  const [active, setActive] = React.useState(firstId);
  React.useEffect(() => {
    try {
      const saved = localStorage.getItem("gcore_docs_method");
      if (saved && tabs.find(t => t.props.id === saved)) {
        setActive(saved);
      }
    } catch (_) {}
  }, []);
  React.useEffect(() => {
    try {
      document.querySelectorAll("h2[id], h3[id]").forEach(heading => {
        const visible = heading.offsetParent !== null;
        document.querySelectorAll(`a[href="#${heading.id}"]`).forEach(link => {
          if (link.closest("h1,h2,h3,h4,h5,h6")) return;
          const li = link.closest("li");
          if (li) li.style.display = visible ? "" : "none";
        });
      });
    } catch (_) {}
    window.dispatchEvent(new Event("scroll"));
  }, [active]);
  const handleClick = id => {
    setActive(id);
    try {
      localStorage.setItem("gcore_docs_method", id);
    } catch (_) {}
  };
  return <div>
      <div className="not-prose flex gap-0 border-b border-zinc-200 dark:border-zinc-800 mb-8 mt-2" role="tablist">
        {tabs.map(tab => {
    const isActive = active === tab.props.id;
    return <button key={tab.props.id} role="tab" aria-selected={isActive} onClick={() => handleClick(tab.props.id)} className={["px-4 py-2 text-sm font-medium border-b-2 -mb-px transition-colors cursor-pointer", isActive ? "border-primary text-primary" : "border-transparent text-zinc-500 hover:text-zinc-800 dark:hover:text-zinc-200"].join(" ")}>
              {tab.props.label}
            </button>;
  })}
      </div>

      {tabs.map(tab => <div key={tab.props.id} style={{
    display: active === tab.props.id ? "" : "none"
  }}>
          {tab.props.children}
        </div>)}
    </div>;
};

<MethodSwitch>
  <MethodSection id="portal" label="Customer Portal">
    A template packages a WebAssembly binary together with a predefined configuration — environment variables, secrets, response headers, and instructions — so the same application can be deployed repeatedly without reconfiguring it from scratch. Templates can be created from a new binary or saved from an existing application.

    ## Create a template

    The configuration process is identical for HTTP and CDN applications.

    <Tabs>
      <Tab title="From the Templates page">
        1\. In the [Gcore Customer Portal](https://portal.gcore.com), navigate to **FastEdge** and open **HTTP Applications** or **CDN Applications**.

        2\. Select **Templates** and click **Create template**.

        <Frame>
          <img src="https://mintcdn.com/gcore/7EHMS8BIhxfXwFhB/images/docs/fastedge/create-manage-templates/create-template-button.png?fit=max&auto=format&n=7EHMS8BIhxfXwFhB&q=85&s=9ab2474377fdf7ed7efd82bf993d797c" alt="Create template button" width="1536" height="674" data-path="images/docs/fastedge/create-manage-templates/create-template-button.png" />
        </Frame>

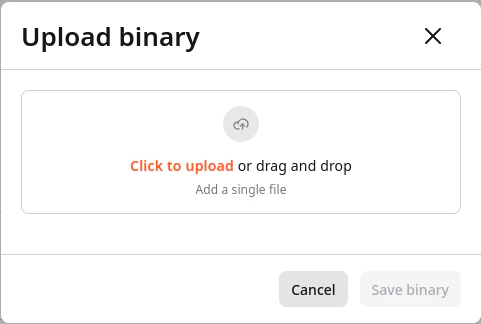
        3\. Upload a `.wasm` binary. Click the upload area or drag and drop the file. Once the upload completes, click **Save binary** — the rest of the form fields appear after the binary is saved.
        <Frame>
          <img src="https://mintcdn.com/gcore/yKie2I_xdaIxD6qJ/images/docs/fastedge/create-manage-templates/create-template-upload-binary.png?fit=max&auto=format&n=yKie2I_xdaIxD6qJ&q=85&s=95bac25606fe4ce70a6d6b58c8f29bb4" alt="Add raw binary dialog" width="481" height="324" data-path="images/docs/fastedge/create-manage-templates/create-template-upload-binary.png" />
        </Frame>

        4\. Enter the template metadata:

        * **Name** — required.
        * **Description** — optional, shown in the template list.
        * **Usage instructions** — optional, displayed when deploying from this template. Include any required variables or configuration notes.

        5\. Define template parameters:

        * Leave the **Mandatory parameter** checkbox unchecked for optional parameters.
        * Select **Mandatory parameter** to require a value at deployment time.
        * Set the parameter type to **Secret** to link the value from Secrets Manager — the deploying user will need to supply a secret rather than a plain value.

        <Frame>
          <img src="https://mintcdn.com/gcore/yKie2I_xdaIxD6qJ/images/docs/fastedge/create-manage-templates/add-secret-parameter.png?fit=max&auto=format&n=yKie2I_xdaIxD6qJ&q=85&s=0141ac4cefdd3b55cabe5da10f3949b2" alt="Secret parameter marked as required" width="5760" height="1008" data-path="images/docs/fastedge/create-manage-templates/add-secret-parameter.png" />
        </Frame>

        <Frame>
          <img src="https://mintcdn.com/gcore/yKie2I_xdaIxD6qJ/images/docs/fastedge/create-manage-templates/example-variable-encrypt.png?fit=max&auto=format&n=yKie2I_xdaIxD6qJ&q=85&s=d3b045c85c893268547245e08aa8c309" alt="Example of a secret parameter in an app" width="1292" height="191" data-path="images/docs/fastedge/create-manage-templates/example-variable-encrypt.png" />
        </Frame>

        6\. Click **Save template**.

        The template is now available in the account.

        <Info>
          Templates are account-scoped. To make a template visible to other users in the account, contact the account admin.
        </Info>
      </Tab>

      <Tab title="From an existing application">
        Converting an existing application creates a template from its binary. The application name becomes the template name, and environment variable names are carried over as parameter definitions — their values are not included.

        1\. In the Customer Portal, navigate to **FastEdge** and open **HTTP Applications** or **CDN Applications**.

        2\. On the **Applications** page, click the three-dot icon next to the application.

        3\. Select **Manage**.

        4\. Click **Actions** and choose **Create template**.

        <Frame>
          <img src="https://mintcdn.com/gcore/7EHMS8BIhxfXwFhB/images/docs/fastedge/create-manage-templates/create-template-from-app.png?fit=max&auto=format&n=7EHMS8BIhxfXwFhB&q=85&s=8a75b9eea05f7f35329803638d2d7019" alt="Create template from app menu" width="1536" height="674" data-path="images/docs/fastedge/create-manage-templates/create-template-from-app.png" />
        </Frame>

        5\. Review the configuration. Update the name and description if needed.

        6\. Click **Save template**.
      </Tab>
    </Tabs>

    ## Edit a template

    1. In the Customer Portal, navigate to **FastEdge** and open **HTTP Applications** or **CDN Applications**.

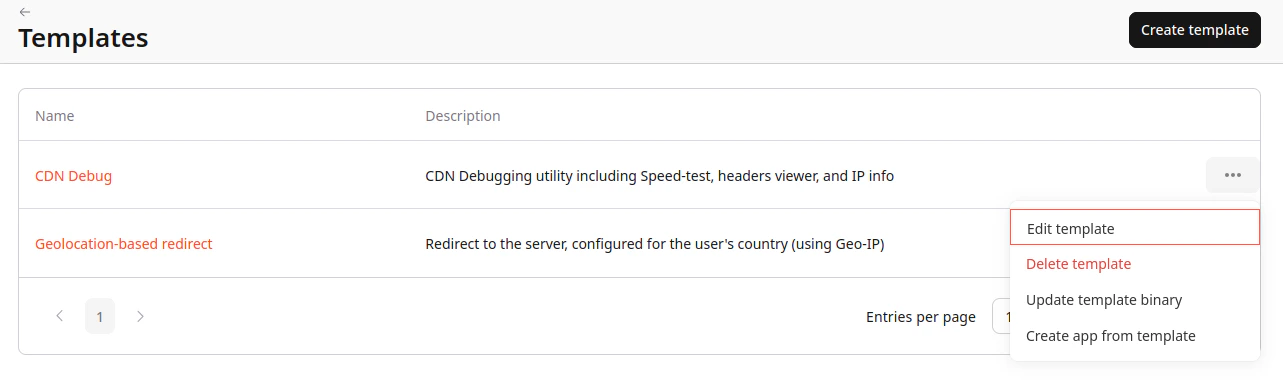
    2. Select **Templates** and click the three-dot icon next to the template.

    3. Click **Edit template**.

    <Frame>
      <img src="https://mintcdn.com/gcore/yKie2I_xdaIxD6qJ/images/docs/fastedge/create-manage-templates/edit-template-menu.png?fit=max&auto=format&n=yKie2I_xdaIxD6qJ&q=85&s=a832aa73e8fa297da87a76a0eff75bb8" alt="Edit template menu item" width="1283" height="387" data-path="images/docs/fastedge/create-manage-templates/edit-template-menu.png" />
    </Frame>

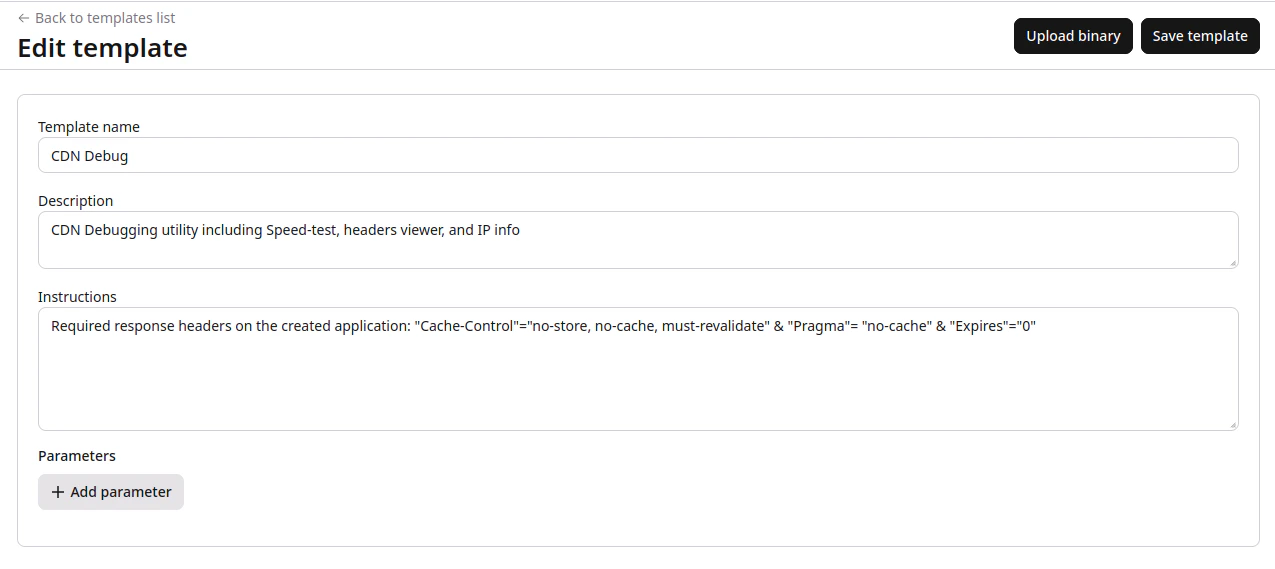
    4. Update the configuration and click **Save template**.
    <Frame>
      <img src="https://mintcdn.com/gcore/yKie2I_xdaIxD6qJ/images/docs/fastedge/create-manage-templates/edit-template-form.png?fit=max&auto=format&n=yKie2I_xdaIxD6qJ&q=85&s=531fe15c431632583d61c96f2a494cca" alt="Edit template form" width="1275" height="569" data-path="images/docs/fastedge/create-manage-templates/edit-template-form.png" />
    </Frame>

    ## Delete a template

    <Warning>
      Deleted templates cannot be restored.
    </Warning>

    1. In the Customer Portal, navigate to **FastEdge** and open **HTTP Applications** or **CDN Applications**.

    2. Select **Templates** and click the three-dot icon next to the template.

    3. Click **Delete template**.

    <Frame>
      <img src="https://mintcdn.com/gcore/yKie2I_xdaIxD6qJ/images/docs/fastedge/create-manage-templates/delete-template.png?fit=max&auto=format&n=yKie2I_xdaIxD6qJ&q=85&s=7fd3a603b967b2bc06893976695c6be7" alt="Delete template menu item" width="4292" height="1292" data-path="images/docs/fastedge/create-manage-templates/delete-template.png" />
    </Frame>

    ## Update template binary

    Use this option to replace the WebAssembly binary without changing the template's name, description, or parameters.

    1. In the Customer Portal, navigate to **FastEdge** and open **HTTP Applications** or **CDN Applications**.

    2. Select **Templates** and click the three-dot icon next to the template.

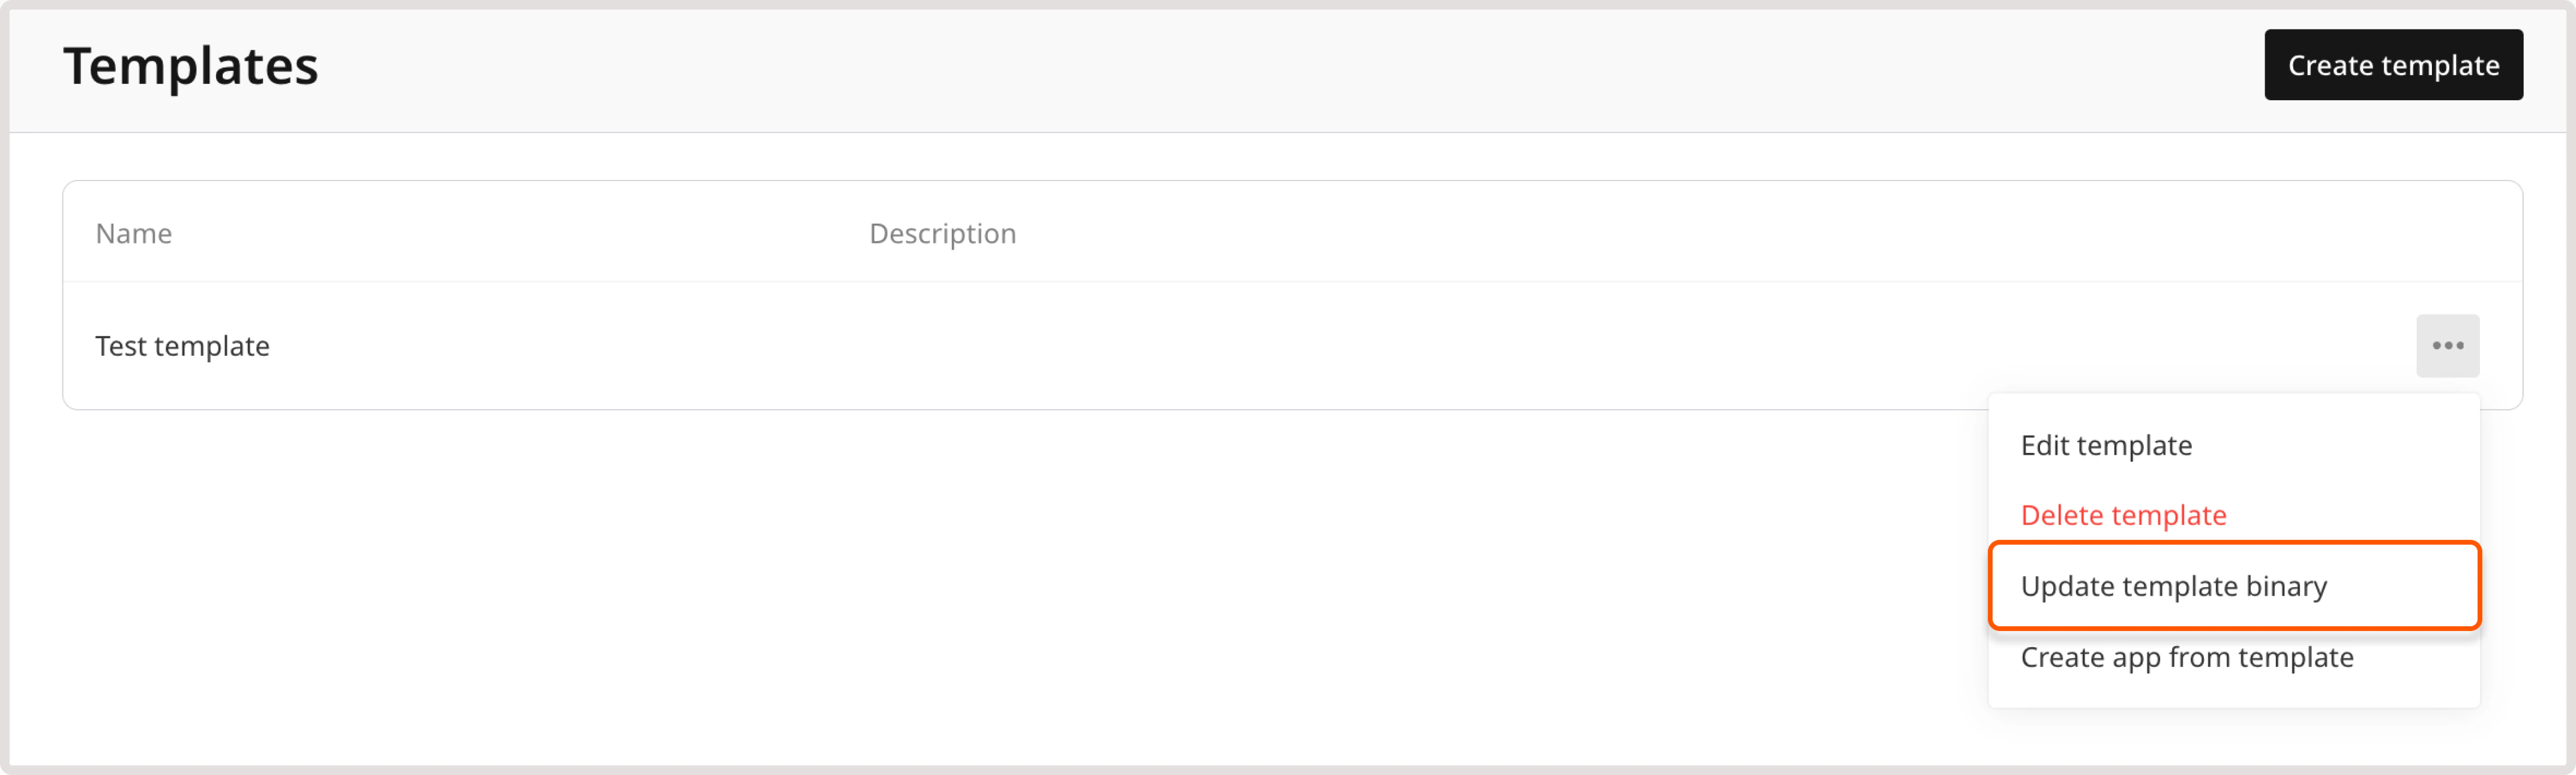
    3. Click **Update template binary**.
    <Frame>
      <img src="https://mintcdn.com/gcore/yKie2I_xdaIxD6qJ/images/docs/fastedge/create-manage-templates/update-template-binary.png?fit=max&auto=format&n=yKie2I_xdaIxD6qJ&q=85&s=a370782449461feb0c2016936db13873" alt="Update template binary menu item" width="4292" height="1292" data-path="images/docs/fastedge/create-manage-templates/update-template-binary.png" />
    </Frame>

    4. Upload the new `.wasm` file and click **Save binary**.

    <Frame>
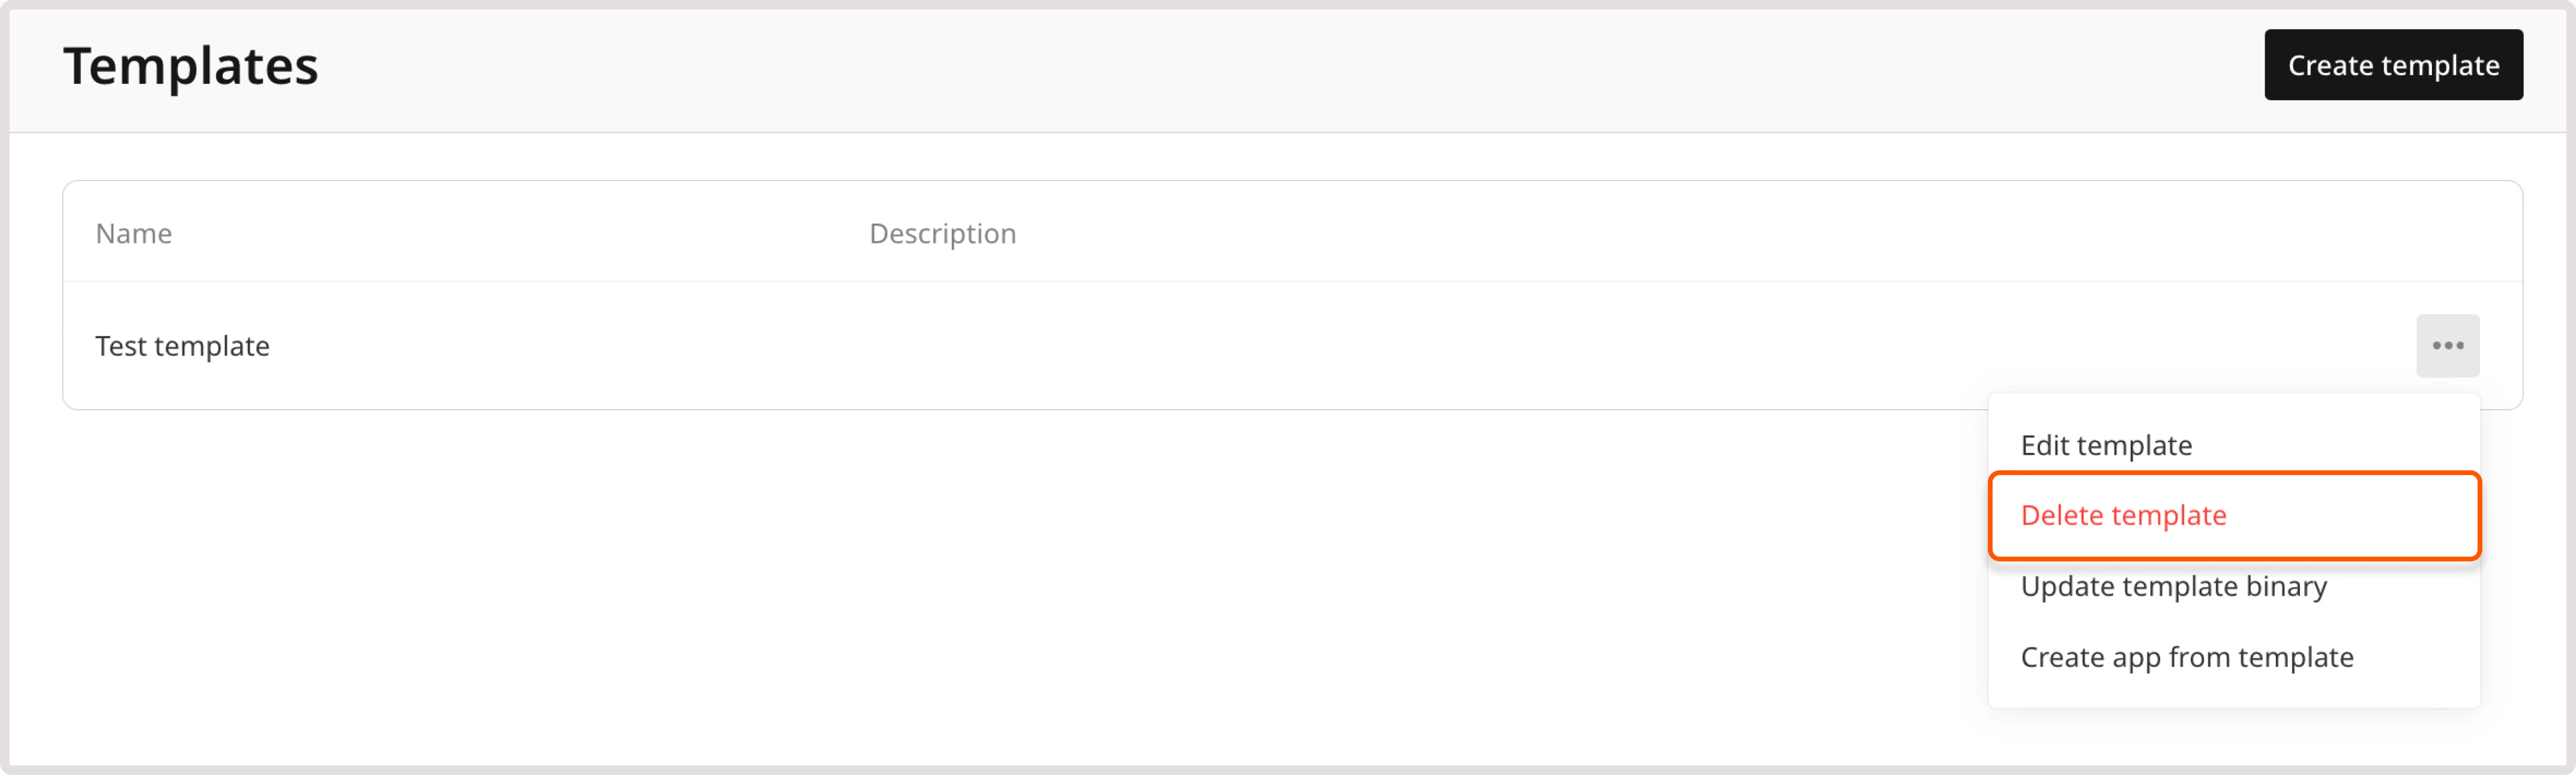
      <img src="https://mintcdn.com/gcore/yKie2I_xdaIxD6qJ/images/docs/fastedge/create-manage-templates/create-template-upload-binary.png?fit=max&auto=format&n=yKie2I_xdaIxD6qJ&q=85&s=95bac25606fe4ce70a6d6b58c8f29bb4" alt="Upload template binary dialog" width="481" height="324" data-path="images/docs/fastedge/create-manage-templates/create-template-upload-binary.png" />
    </Frame>

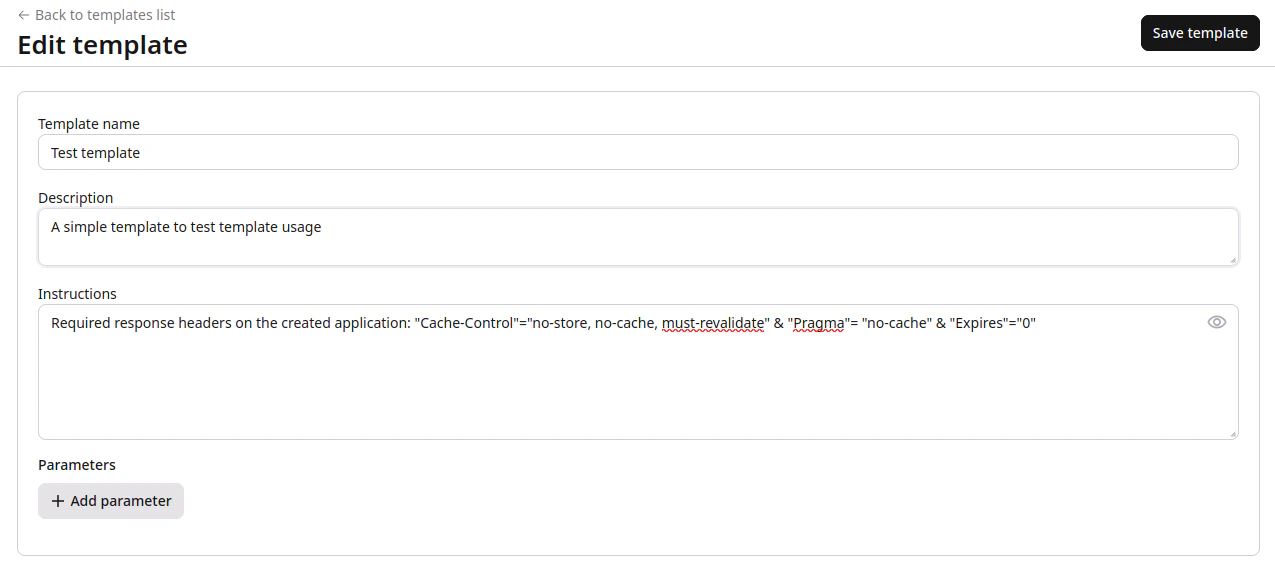
    5. Review the configuration and click **Save template**.
    <Frame>
      <img src="https://mintcdn.com/gcore/yKie2I_xdaIxD6qJ/images/docs/fastedge/create-manage-templates/edit-template-binary.png?fit=max&auto=format&n=yKie2I_xdaIxD6qJ&q=85&s=db1c3136e1ea5fe282c8295b5e0d2017" alt="Edit template binary form" width="1275" height="578" data-path="images/docs/fastedge/create-manage-templates/edit-template-binary.png" />
    </Frame>

    ## Create an app from a template

    1. In the Customer Portal, navigate to **FastEdge** and open **HTTP Applications** or **CDN Applications**.

    2. Select **Templates**, then click the three-dot icon next to the template and choose **Create app from template**.

    3. Complete the application configuration:

    * [HTTP application from a template](/fastedge/getting-started/create-fastedge-apps#deploy-an-app-from-a-template)
    * [CDN application from a template](/fastedge/getting-started/integrate-cdn-with-fastedge#deploy-from-the-template)

    After deployment, the application inherits the template's binary and predefined configuration. Any mandatory parameters defined in the template must be supplied during deployment.
  </MethodSection>

  <MethodSection id="api" label="REST API">
    A template packages a WebAssembly binary together with a predefined configuration — environment variables, secrets, response headers, and parameters — and can be deployed as an application any number of times without manual reconfiguration.

    <p>All requests authenticate with an [API token](/account-settings/api-tokens). Set it as an environment variable before running the examples:</p>

    ```bash theme={null}
    export GCORE_API_KEY="{YOUR_API_KEY}"
    ```

    ## Create a template

    Creating a template requires two steps: upload a `.wasm` binary, then create the template referencing that binary.

    ### Upload a binary

    Send the raw `.wasm` file as an `application/octet-stream` body:

    ```bash theme={null}
    curl -X POST https://api.gcore.com/fastedge/v1/binaries/raw \
      -H "Authorization: APIKey $GCORE_API_KEY" \
      -H "Content-Type: application/octet-stream" \
      --data-binary @my-app.wasm
    ```

    The response contains the binary ID:

    ```json theme={null}
    {
      "id": 4748,
      "api_type": "wasi-http",
      "status": 1
    }
    ```

    The `api_type` is determined by the binary and cannot be set manually. Use the returned `id` as the `binary_id` in the next step.

    ### Create the template

    ```bash theme={null}
    curl -X POST https://api.gcore.com/fastedge/v1/template \
      -H "Authorization: APIKey $GCORE_API_KEY" \
      -H "Content-Type: application/json" \
      -d '{
        "name": "My template",
        "short_descr": "Short description shown in the template list",
        "long_descr": "Full usage instructions shown at deployment time.",
        "binary_id": BINARY_ID,
        "owned": true,
        "params": [
          {
            "name": "BASE_URL",
            "data_type": "string",
            "descr": "Base URL for the application",
            "mandatory": true
          }
        ]
      }'
    ```

    The response contains the created template:

    ```json theme={null}
    {
      "id": 174,
      "name": "My template",
      "api_type": "wasi-http",
      "short_descr": "Short description shown in the template list",
      "long_descr": "Full usage instructions shown at deployment time.",
      "owned": true
    }
    ```

    Template names may only contain letters, digits, spaces, underscores, and hyphens.

    <Info>
      The `owned` field controls account visibility, not ownership. When set to `true`, the template is visible to all users in the account. When set to `false`, it is private to the token owner.
    </Info>

    ## List templates

    ```bash theme={null}
    curl https://api.gcore.com/fastedge/v1/template \
      -H "Authorization: APIKey $GCORE_API_KEY"
    ```

    To filter by application type, add the `api_type` query parameter (`wasi-http` for HTTP applications or `proxy-wasm` for CDN applications):

    ```bash theme={null}
    curl "https://api.gcore.com/fastedge/v1/template?api_type=wasi-http&only_mine=true" \
      -H "Authorization: APIKey $GCORE_API_KEY"
    ```

    The response field is `templates`:

    ```json theme={null}
    {
      "count": 2,
      "templates": [
        {
          "id": 174,
          "name": "My template",
          "api_type": "wasi-http"
        }
      ]
    }
    ```

    ## Get template details

    ```bash theme={null}
    curl https://api.gcore.com/fastedge/v1/template/TEMPLATE_ID \
      -H "Authorization: APIKey $GCORE_API_KEY"
    ```

    Response:

    ```json theme={null}
    {
      "id": 174,
      "name": "My template",
      "api_type": "wasi-http",
      "binary_id": 4748,
      "short_descr": "Short description",
      "long_descr": "Full usage instructions.",
      "owned": true,
      "params": [
        {
          "name": "BASE_URL",
          "data_type": "string",
          "descr": "Base URL for the application",
          "mandatory": true
        }
      ]
    }
    ```

    ## Edit a template

    <Warning>
      `PUT` replaces the entire template definition. Any fields omitted from the request body — including `params` — are cleared. Always include the full configuration.
    </Warning>

    ```bash theme={null}
    curl -X PUT https://api.gcore.com/fastedge/v1/template/TEMPLATE_ID \
      -H "Authorization: APIKey $GCORE_API_KEY" \
      -H "Content-Type: application/json" \
      -d '{
        "name": "My template",
        "short_descr": "Updated description",
        "long_descr": "Updated usage instructions.",
        "binary_id": BINARY_ID,
        "owned": true,
        "params": [
          {
            "name": "BASE_URL",
            "data_type": "string",
            "descr": "Base URL for the application",
            "mandatory": true
          }
        ]
      }'
    ```

    ## Update template binary

    To replace the binary while keeping the name, description, and parameters, upload a new binary first, then update the template with the new `binary_id`.

    Upload the new binary:

    ```bash theme={null}
    curl -X POST https://api.gcore.com/fastedge/v1/binaries/raw \
      -H "Authorization: APIKey $GCORE_API_KEY" \
      -H "Content-Type: application/octet-stream" \
      --data-binary @my-app-v2.wasm
    ```

    Then update the template with the new binary ID:

    ```bash theme={null}
    curl -X PUT https://api.gcore.com/fastedge/v1/template/TEMPLATE_ID \
      -H "Authorization: APIKey $GCORE_API_KEY" \
      -H "Content-Type: application/json" \
      -d '{
        "name": "My template",
        "short_descr": "Short description",
        "long_descr": "Usage instructions.",
        "binary_id": NEW_BINARY_ID,
        "owned": true,
        "params": []
      }'
    ```

    ## Delete a template

    ```bash theme={null}
    curl -X DELETE https://api.gcore.com/fastedge/v1/template/TEMPLATE_ID \
      -H "Authorization: APIKey $GCORE_API_KEY"
    ```

    A successful response returns HTTP 200 with an empty body.

    <Warning>
      Deleted templates cannot be restored. Applications previously deployed from the template are not affected.
    </Warning>

    ## Create an app from a template

    Pass the template ID in the `template` field of the application creation request. Provide values for any mandatory parameters in `env`:

    ```bash theme={null}
    curl -X POST https://api.gcore.com/fastedge/v1/apps \
      -H "Authorization: APIKey $GCORE_API_KEY" \
      -H "Content-Type: application/json" \
      -d '{
        "name": "my-app",
        "template": TEMPLATE_ID,
        "env": {
          "BASE_URL": "https://example.com"
        }
      }'
    ```

    The application inherits the template's binary and configuration. The response includes the new application's `id` and `url`.
  </MethodSection>
</MethodSwitch>