Persistent storage in Kubernetes is provided through PersistentVolumes (PVs) and PersistentVolumeClaims (PVCs). This article shows how to create a PVC backed by a custom StorageClass, bind it to a pod, and resize it when additional storage is needed.

PV and PVC overview

A PV (PersistentVolume) in Managed Kubernetes is a resource used to store data. It is attached to pods but has a separate lifecycle, specified by its reclaim policy. This policy determines if a PV will continue to exist or will be deleted when a pod attached to it gets destroyed. A PV represents available storage in the cluster. Applications don’t use PVs directly — instead, they request storage by creating a PersistentVolumeClaim (PVC). Kubernetes forwards that request to a StorageClass, which provisions a matching PV automatically.

Create a PVC

Before creating a PVC, create a storage class with the required disk type. Gcore provides the following disk types:
Volume typeFeatures
standardStandard Network SSD disk, which provides stable and high random I/O performance, as well as high data reliability (6 IOPS per 1 GiB; 0.4 MB/s per 1 GiB.) The IOPS performance limit is 4,500. The bandwidth limit is 300 MB/s.
ssd_hiiopsHigh IOPS SSD High-performance SSD block storage designed for latency-sensitive transactional workloads (60 IOPS per 1 GiB; 2.5 MB/s per 1 GiB.) The IOPS performance limit is 9,000. The bandwidth limit is 500 MB/s.
ssd_lowlatencySSD Low Latency SSD block storage, designed for applications that require low-latency storage and real-time data processing. It can achieve IOPS performance of up to 5000, with an average latency of 300 µs.
  1. Verify that the required disk type is available in the target region. Navigate to Managed Kubernetes, select the region, and click Create Cluster. In the Pools section, open the Volume type dropdown to see the available options.
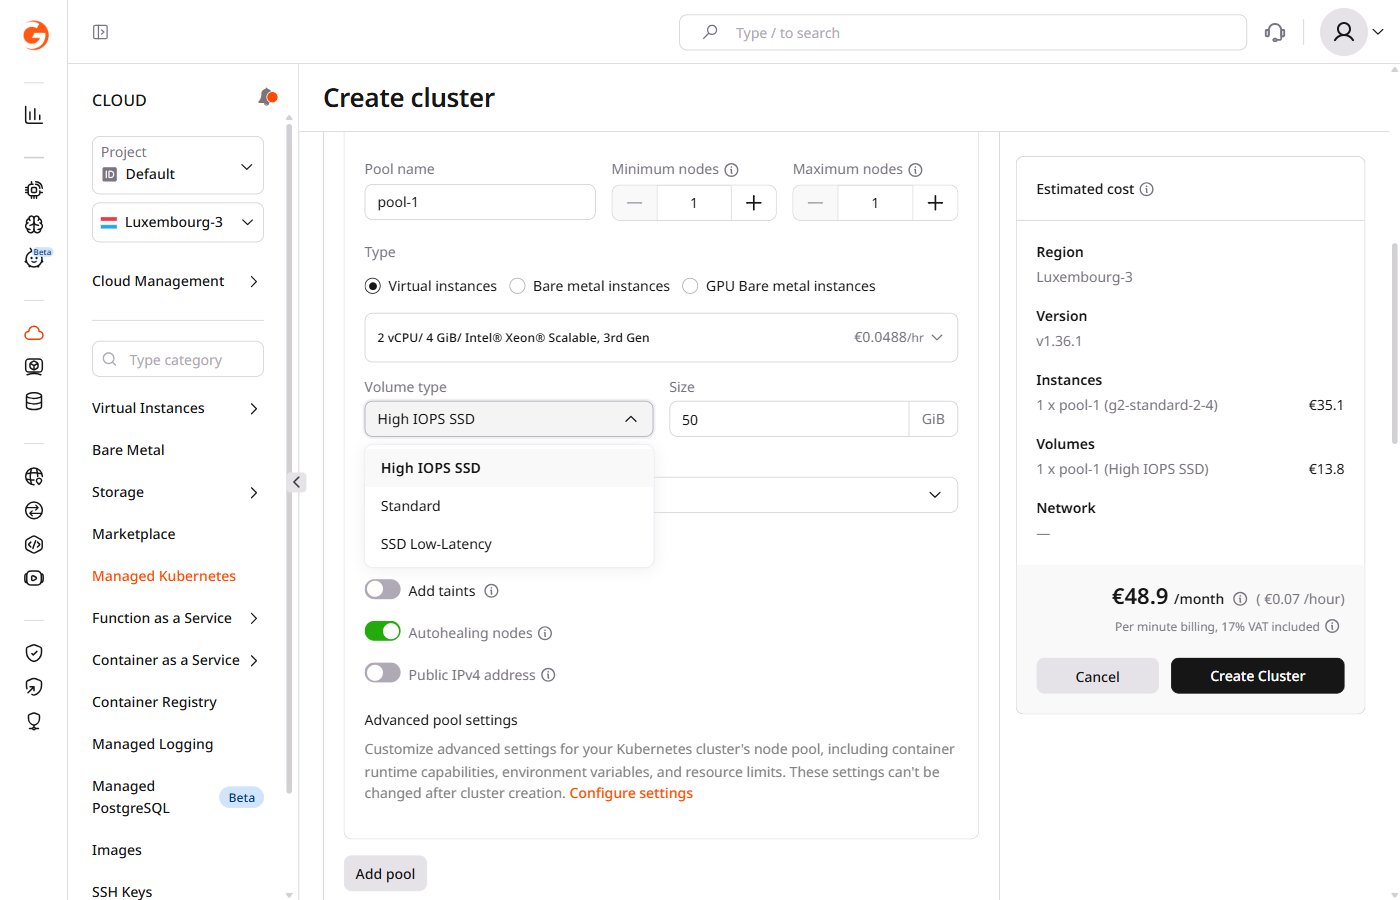
Volume type dropdown in Kubernetes cluster creation showing High IOPS SSD, Standard, and SSD Low-Latency options
A storage class configured with a disk type unavailable in the target region will fail to provision PVs. Choose one of the available volume types and use its identifier in the StorageClass manifest.
  1. Create a YAML file to create a storage class with the required disk type:
apiVersion: storage.k8s.io/v1  
kind: StorageClass  
metadata:  
  name: csi-sc-cinderplugin-hiiops  
  annotations:  
    storageclass.kubernetes.io/is-default-class: "false"  
provisioner: cinder.csi.gcorelabs.com  
parameters:  
  type: ssd_hiiops  
allowVolumeExpansion: true
The manifest defines a StorageClass that provisions volumes of the selected disk type. Replace the placeholder values:
  • csi-sc-cinderplugin-hiiops: Storage class name
  • ssd_hiiops: Disk type (standard, ssd_hiiops, or ssd_lowlatency)
  1. Run the kubectl command from the file directory:
kubectl apply -f <name of the created YAML file>.yaml
The expected output:
storageclass.storage.k8s.io/<name of the created storage class> created
Once the StorageClass exists, create a PersistentVolumeClaim that requests storage from it.
  1. Create a YAML file to configure a PVC:
apiVersion: v1  
kind: PersistentVolumeClaim  
metadata:  
  name: block-pvc  
spec:  
  storageClassName: csi-sc-cinderplugin-hiiops  
  accessModes:  
    - ReadWriteOnce  
  resources:  
    requests:  
      storage: 1Gi
Replace the placeholder values:
  • block-pvc: PVC name
  • csi-sc-cinderplugin-hiiops: Name of the created storage class
  • 1Gi: Storage size
  1. Run the kubectl command from the file directory:
kubectl apply -f <name of the created YAML file>.yaml
The expected output:
persistentvolumeclaim/<name of the created PVC> created
The PVC is now created with a storage class of the required disk type.

Bind a PVC to a pod

  1. Reference the PVC from the pod manifest to mount the volume inside the container.
apiVersion: v1  
kind: Pod  
metadata:  
  name: mypod
spec:  
  containers:  
    - name: myfrontend
      image: nginx  
      volumeMounts:  
        - mountPath: "/var/www/html"
          name: mypd
  volumes:  
    - name: mypd
      persistentVolumeClaim:  
        claimName: block-pvc
Replace the placeholder values:
  • mypod: Pod name
  • myfrontend: Container name
  • "/var/www/html": Mount path inside the container
  • mypd: Volume name
  • block-pvc: PVC name
  1. Run the kubectl command from the file directory:
kubectl apply -f <name of the created YAML file>.yaml
Expected output:
pod/<pod name> created
The PVC is now connected to the pod. Its containers can access the storage at the configured mount path.

Resize a PVC

To increase the size of a volume, update the PersistentVolumeClaim that was used to provision it. When a PVC is created, Managed Kubernetes provisions a dynamic PV that matches its specs — resizing the PVC triggers a corresponding resize of the underlying PV.
Only increasing PVC storage size is supported. Reducing the size of a PV is not possible.
  1. Find the PVC by querying all PVCs with this command:
kubectl get pvc
  1. In the PVC YAML, update the storage field under resources.requests to the desired size (1Ti, 250Gi, etc.).
For example, a PVC configured for 250 Gi using the standard storage class:
apiVersion: v1
kind: PersistentVolumeClaim
metadata:
  name: example-pvc
spec:
  storageClassName: standard
  accessModes:
    - ReadWriteOnce
  resources:
    requests:
      storage: 250Gi
  1. Run the following command to apply the updated PVC manifest to the cluster:
kubectl apply -f /path/to/example-pvc.yaml
The update may take a few minutes to complete.
  1. Verify the resize was applied successfully:
kubectl get pvc example-pvc