kubectl is the standard command-line client for Kubernetes. It communicates with the Kubernetes API server to create, update, and manage cluster resources. For a complete list of commands, see the kubectl official documentation. The procedures below cover installing kubectl, downloading the cluster kubeconfig from the Customer Portal, and verifying the connection. For a graphical alternative, Lens provides a desktop interface for managing clusters without the command line.

Install kubectl and connect from Windows

1. Download kubectl for Windows. The example below downloads v1.36.0. For the latest version, find the updated command in the Kubernetes official documentation:

curl.exe -LO https://dl.k8s.io/release/v1.36.0/bin/windows/amd64/kubectl.exe
2. Add the directory containing kubectl.exe to the PATH environment variable so the system can find it. First, copy the download path from the command line:
Windows command line showing the kubectl.exe download path to copy
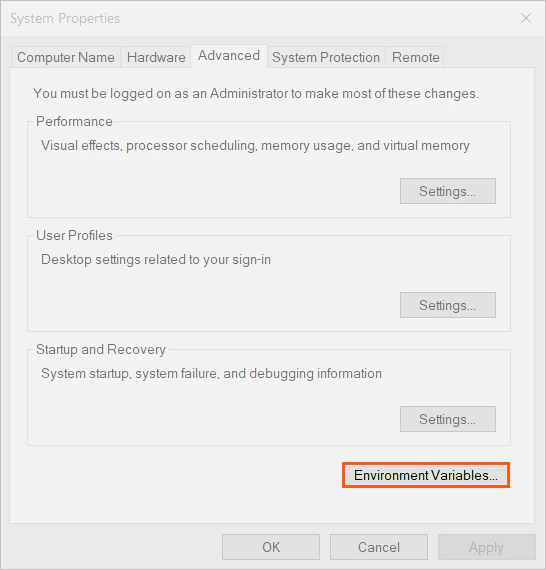
Then navigate to Windows settings > System > About > Advanced system settings (or right-click This PC and select Properties > Advanced system settings):
Windows System Properties dialog showing Advanced system settings link
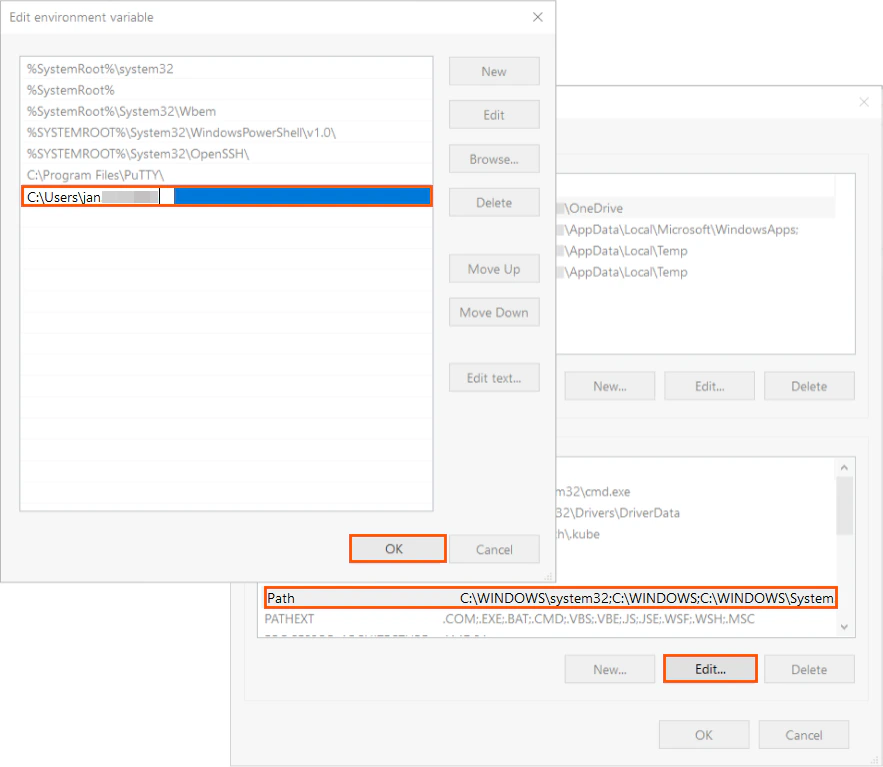
In the dialog, click Environment Variables, double-click the Path system variable, paste the kubectl.exe path into the bottom empty field, and save the changes:
Windows Environment Variables dialog with kubectl path added to the Path system variable
With kubectl available in the system PATH, the next steps configure cluster access. 3. Create the .kube directory in C:\Users\[username] to store the cluster configuration file:
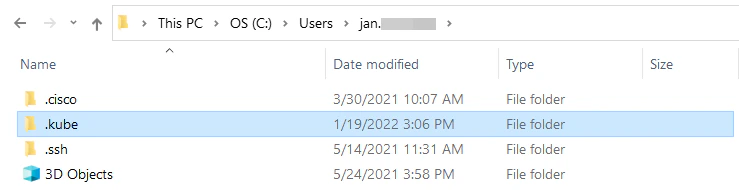
Windows File Explorer showing the .kube directory created in the user home folder
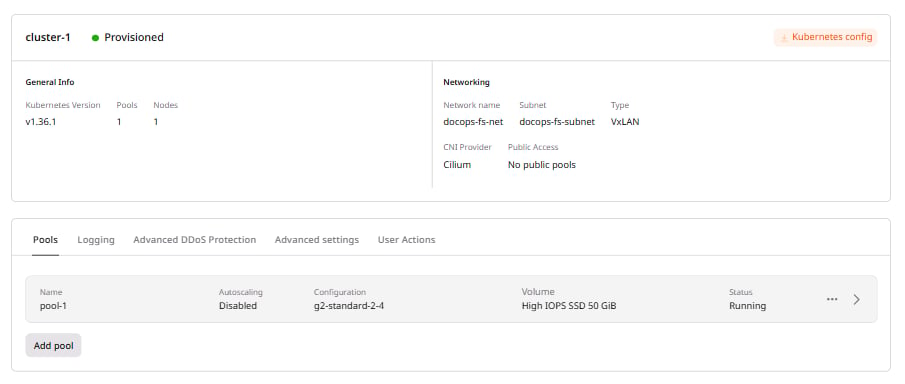
4. In the Gcore Customer Portal, navigate to Cloud > Managed Kubernetes, click the cluster name, then click Kubernetes config to download the configuration file:
Kubernetes cluster overview page with the Kubernetes config button in the top right of the cluster card
5. Rename the downloaded file to config (no extension) and place it in the .kube folder. kubectl can now access it:

Windows File Explorer showing the kubeconfig file renamed to config and placed in the .kube folder
6. Verify kubectl can reach the cluster:
kubectl get pods
Either result — No resources found in default namespace or a list of running pods — confirms kubectl is correctly configured.

Install kubectl and connect from Ubuntu or Linux

1. Download the latest stable kubectl binary:
curl -LO "https://dl.k8s.io/release/$(curl -L -s https://dl.k8s.io/release/stable.txt)/bin/linux/amd64/kubectl"
2. Make the kubectl binary executable:
chmod +x ./kubectl
3. Move the binary to a directory in the PATH variable:
sudo mv ./kubectl /usr/local/bin/kubectl
With kubectl installed, the next steps configure cluster access. 4. Create the .kube directory in the home directory:
mkdir ~/.kube
5. In the Customer Portal, navigate to Cloud > Managed Kubernetes, click the cluster name, then click Kubernetes config to download the configuration file:
Kubernetes cluster overview page with the Kubernetes config button in the top right of the cluster card
6. Rename the downloaded file to config (no extension) and place it in the .kube folder:
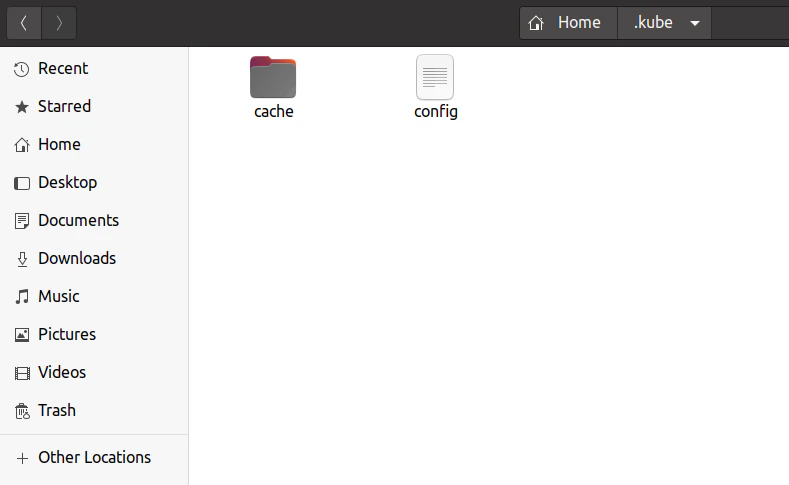
Linux file manager showing the kubeconfig file renamed to config and placed in the .kube folder
7. Confirm cluster access:
kubectl get pods
Successful output confirms that kubectl can communicate with the cluster.

Install kubectl and connect from macOS

1. Download the latest stable kubectl binary. For Intel Macs, use amd64; for Apple Silicon (M1/M2/M3), use arm64:
curl -LO "https://dl.k8s.io/release/$(curl -L -s https://dl.k8s.io/release/stable.txt)/bin/darwin/amd64/kubectl"
2. Make the binary executable:
chmod +x ./kubectl
3. Move the binary to a directory in the PATH variable. Check which directories are in PATH:
echo $PATH
Select a directory from the output and move kubectl there. For example:
sudo mv ./kubectl /usr/local/bin/kubectl
With kubectl installed, the next steps configure cluster access. 4. Create the .kube directory in the home directory:
mkdir ~/.kube
5. In the Customer Portal, navigate to Cloud > Managed Kubernetes, click the cluster name, then click Kubernetes config to download the configuration file:
Kubernetes cluster overview page with the Kubernetes config button in the top right of the cluster card
6. Rename the downloaded file to config (no extension) and place it in the .kube folder. 7. Test the connection:
kubectl get pods
If the command returns pod information or reports that no resources exist, the connection is working correctly.

Renewal of kubectl certificates

Gcore renews kubectl access certificates every two years. Notifications are sent before the renewal date:
  • In the Customer Portal: a notification appears with the expiry date and a reminder to download the new kubeconfig from the cluster page.
  • Via email: two weeks before the renewal date, an email is sent with the renewal date. After the certificate is updated, a confirmation email is sent with a reminder to download the new certificate.