

Enable OIDC authentication
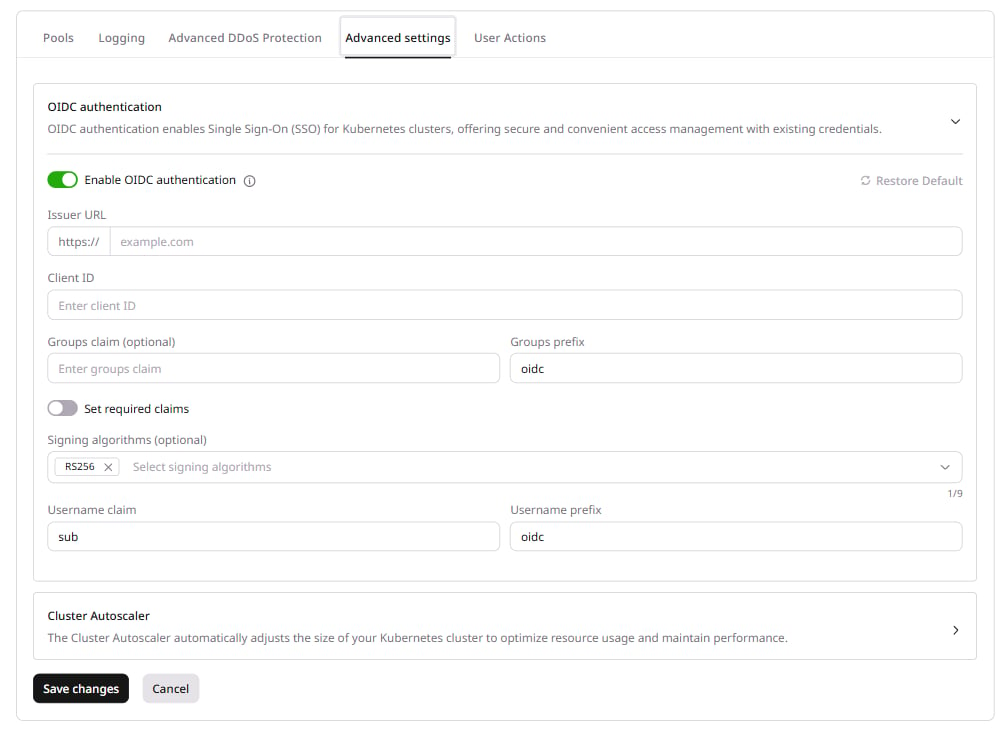
Enable OIDC authentication during cluster creation or in the settings of an existing cluster — the configuration is the same in both cases. To enable OIDC authentication: 1. If creating a new cluster, scroll down and expand the Advanced settings section, then find the OIDC authentication block. For an existing cluster, open the cluster overview and click the Advanced settings tab. 2. Click Enable OIDC authentication toggle and configure the following settings:Connection
-
Issuer URL: Enter the OIDC provider domain without the protocol prefix. For Microsoft Azure AD, enter
login.microsoftonline.com. The portal prependshttps://automatically. - Client ID: Enter a unique identifier to assign to the cluster.
Identity mapping
-
Username claim: Specify the name of the claim in the ID token that contains the username. The default value is
sub. -
Username prefix (optional): Specify a prefix to prepend to the username extracted from the token. Useful to avoid naming conflicts with existing Kubernetes users. The default value is
oidc. - Groups claim (optional): Specify the name of the claim in the ID token that stores a group name. Without user groups, each user is treated independently.
-
Groups prefix (optional): Specify a prefix to prepend to all group names from the OIDC provider. Useful to avoid naming conflicts with existing RBAC groups. The default value is
oidc.
Validation
- Set required claims toggle: Enter any additional claims that must be present in the ID token. If a token is missing any of these claims, authentication fails.
- Signing algorithms (optional): Choose which cryptographic algorithms the API server should accept when verifying ID tokens. By default, tokens must be signed using the RS256 algorithm.
Disable OIDC authentication
To disable OIDC authentication: 1. In the Gcore Customer Portal, navigate to Cloud > Managed Kubernetes and click the cluster name. 2. Open the Advanced settings tab and expand the OIDC authentication section. 3. Disable the toggle.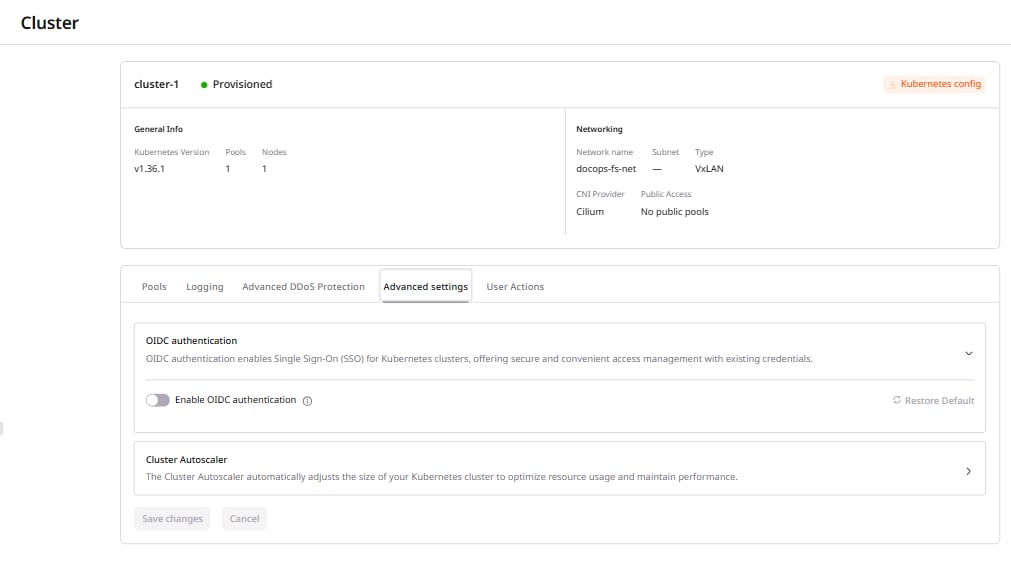
Update OIDC authentication settings
Click Restore Default to reset all OIDC settings to their default values.