The DNS hosting service manages DNS records at no cost.

Activate DNS hosting

  1. In the left sidebar, open Products/Services and select DNS hosting.
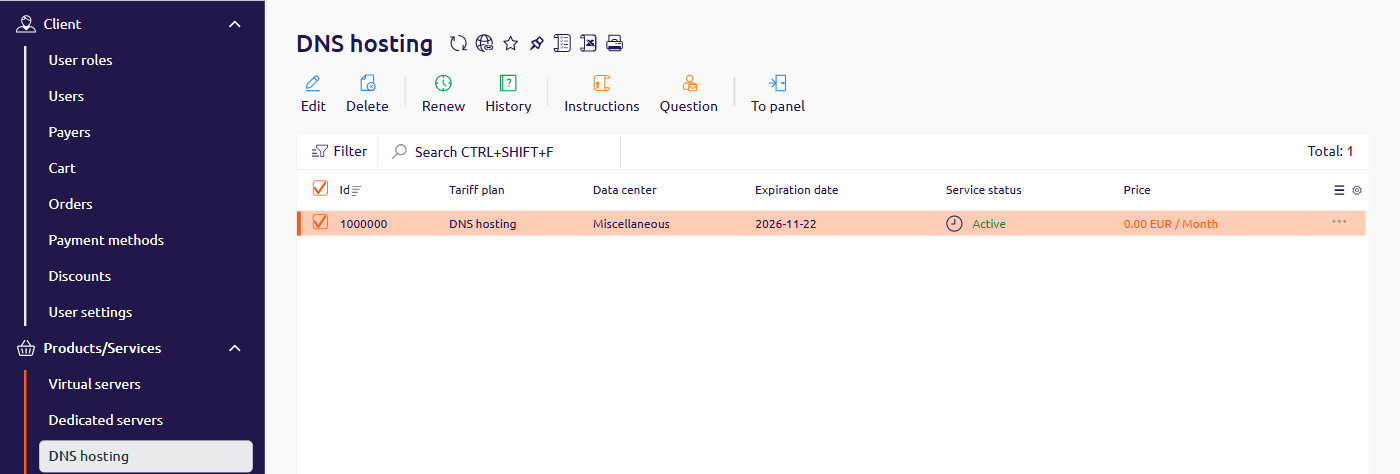
DNS hosting list with the service selected

Set up DNS hosting

Configure the default DNS settings that apply to all domains added to the service.
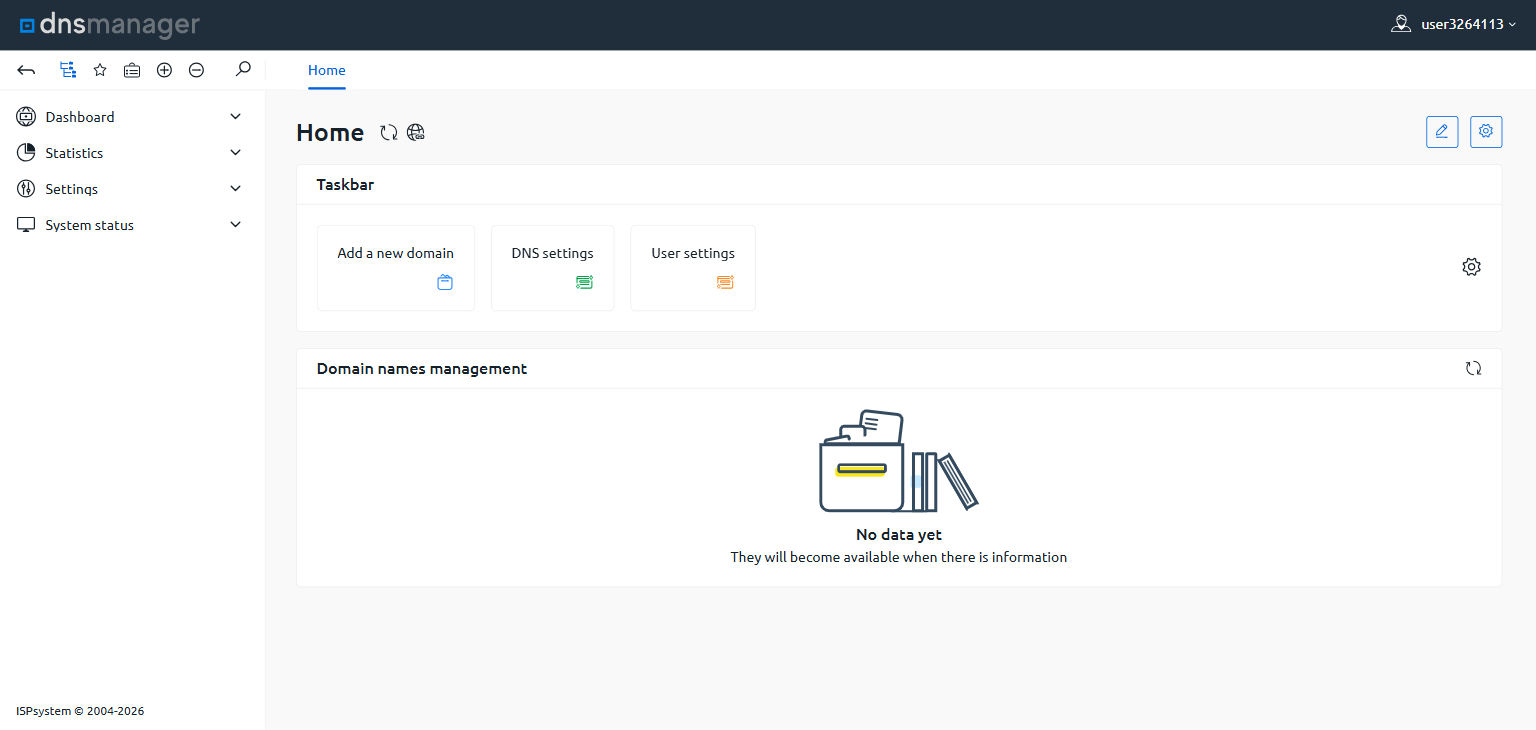
  1. Select the service and click To panel. The DNS hosting control panel opens.
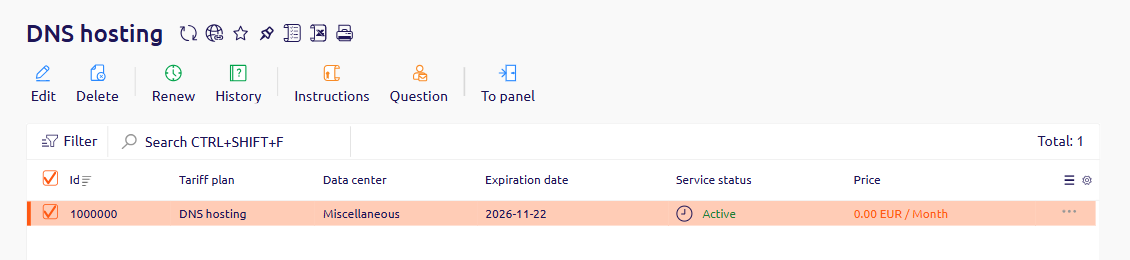
DNS hosting toolbar with To panel and the selected service
  1. In the control panel, navigate to Settings > DNS settings.
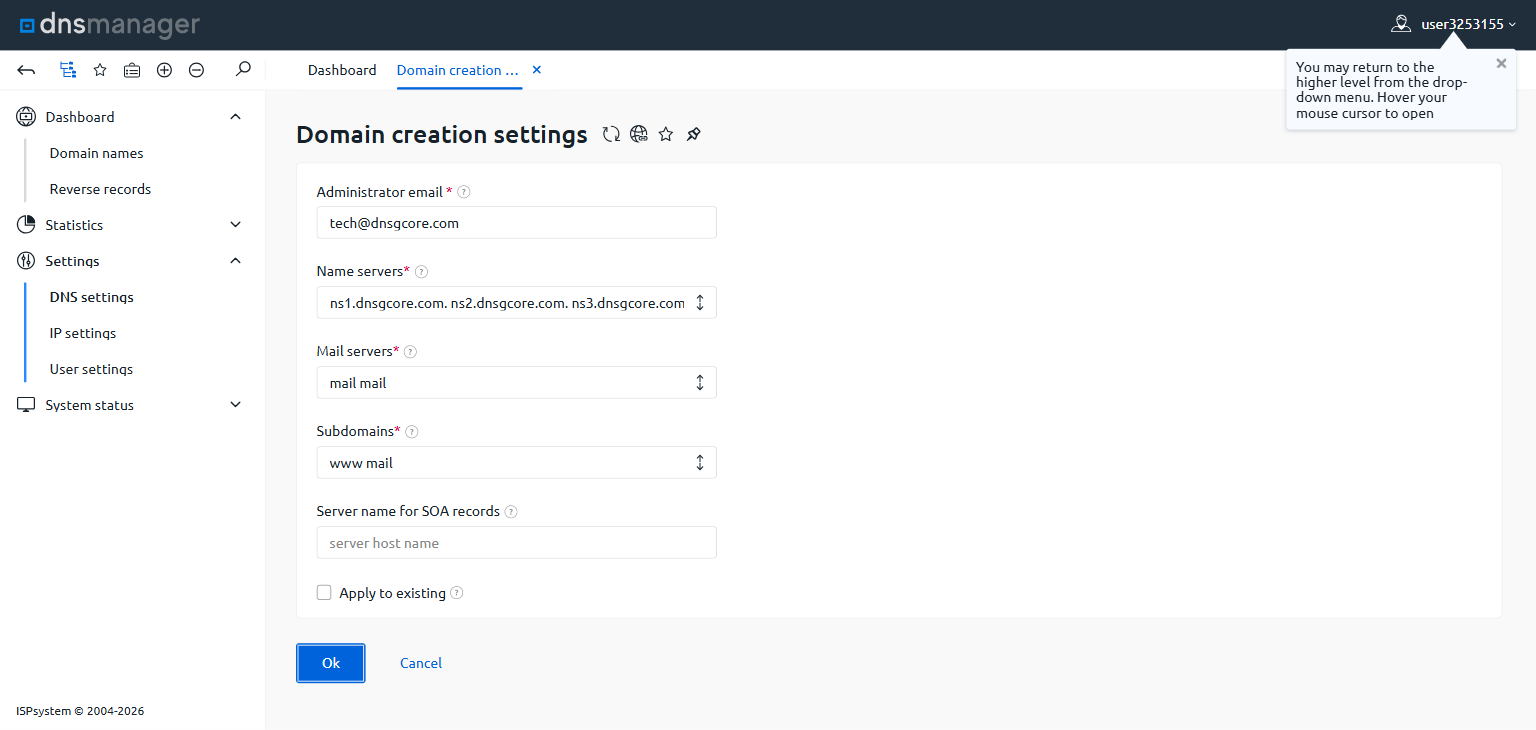
DNS settings
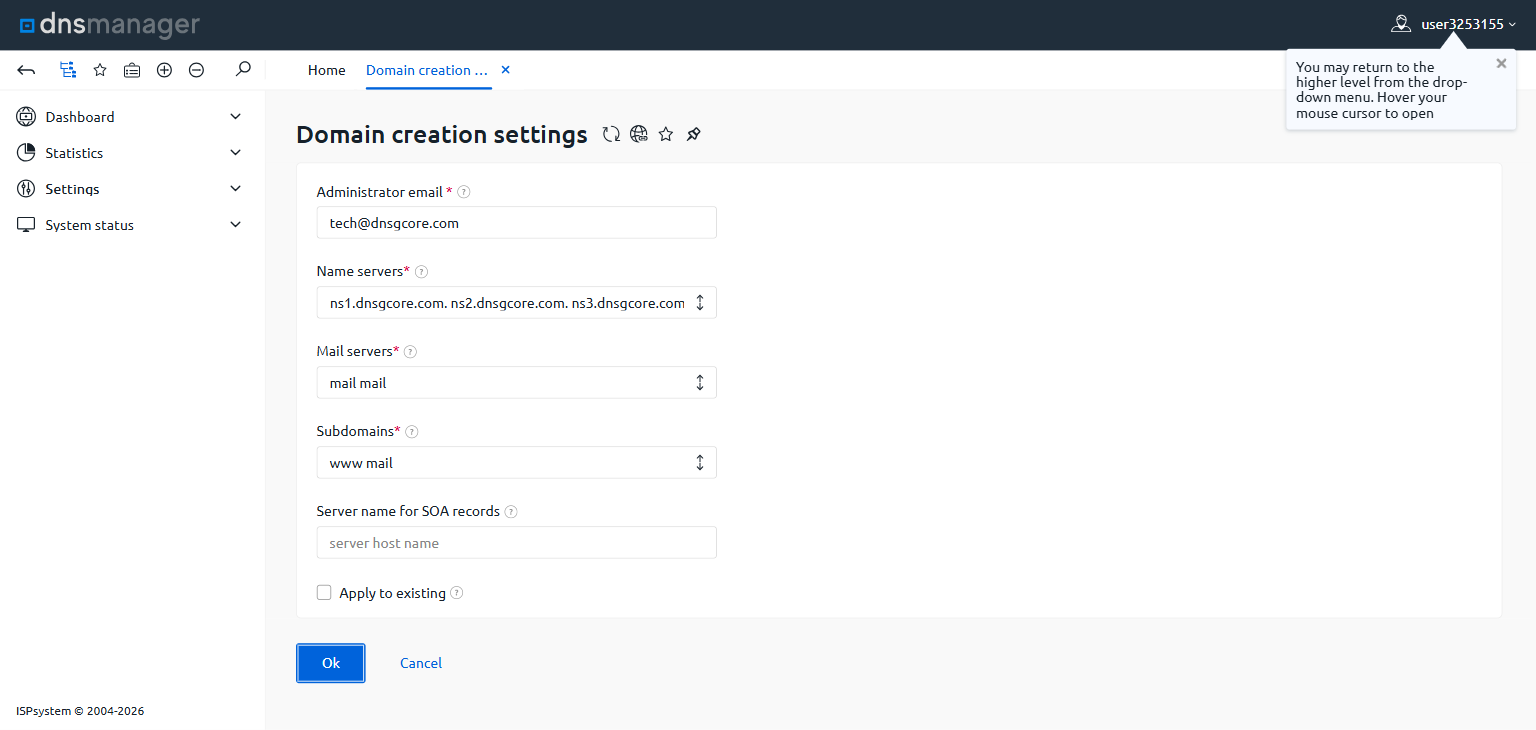
  1. Provide the following settings:
Domain creation settings form
Administrator email: Email address listed in the SOA record as the administrator contact for the managed domains. Name servers: Gcore name server values are pre-filled. Do not change this value. Mail servers: Hostnames of the mail servers for this domain, listed in MX records. Subdomains: Subdomains to create automatically and link to the main domain via A records. Server name for SOA records: Host name to use in SOA records. Leave blank to use the default.
  1. Click OK to apply the settings.

Manage domains

In the DNS hosting control panel, add and configure the domains to manage.
  1. Click Add a new domain.
Add a new domain
  1. Specify the domain to manage along with the associated settings.
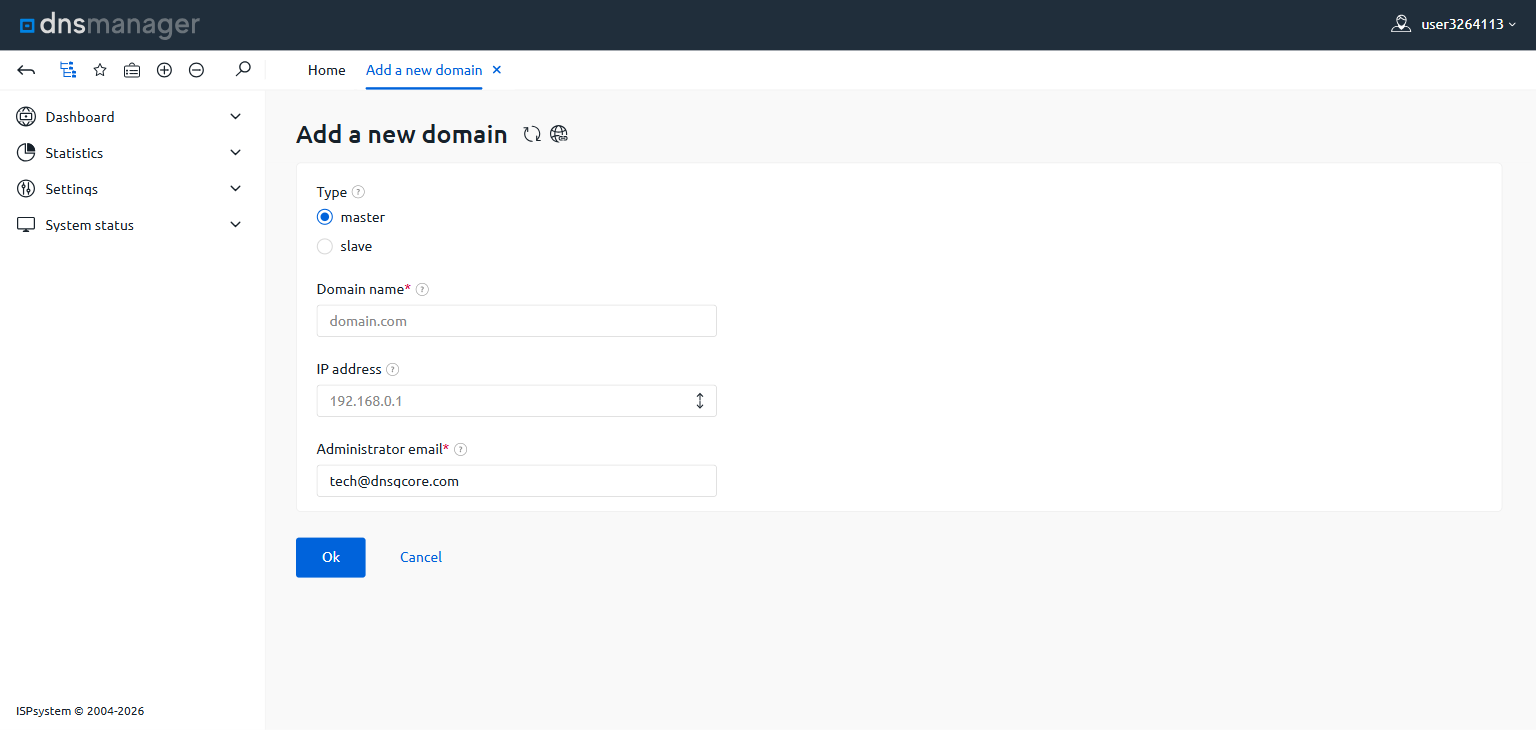
Add a new domain form
Type: Select master to manage the domain’s records directly, or slave to receive records from a master domain. Domain name: Enter the domain for which to manage DNS records. IP address: Enter the IP address of the server hosting the domain. Administrator email (for master type domains only): Email address listed in the SOA records as the administrator contact.
  1. Click OK.
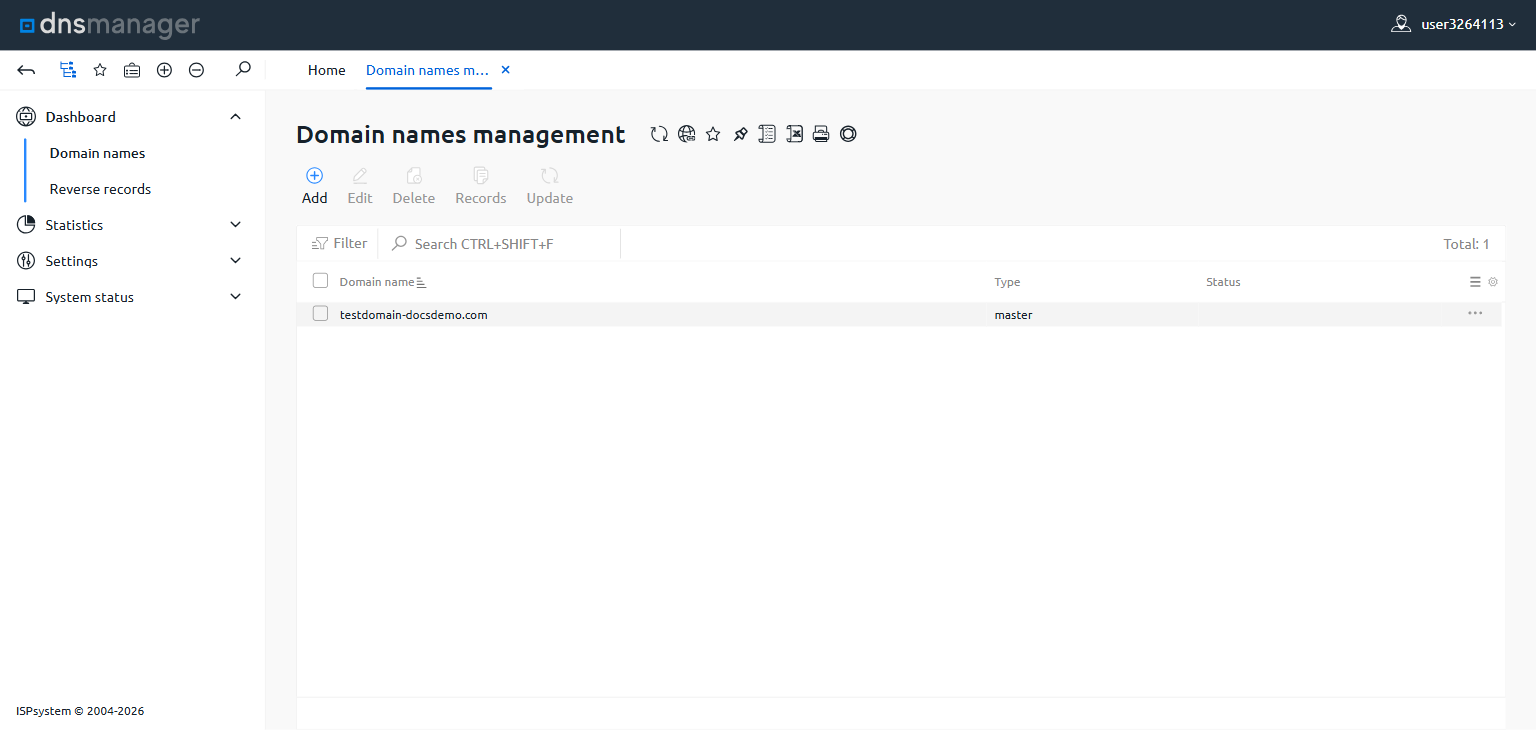
The created domain appears in the Domain names list.
Domain names management list

Manage DNS records

Configure individual DNS records for each managed domain.
  1. In the DNS hosting control panel, navigate to Dashboard > Domain names. Check the checkbox next to the domain for which to set records. Then, click Records.
DNS hosting control panel with Domain names list
  1. The DNS records for the selected domain appear. Click Add to add a new record.
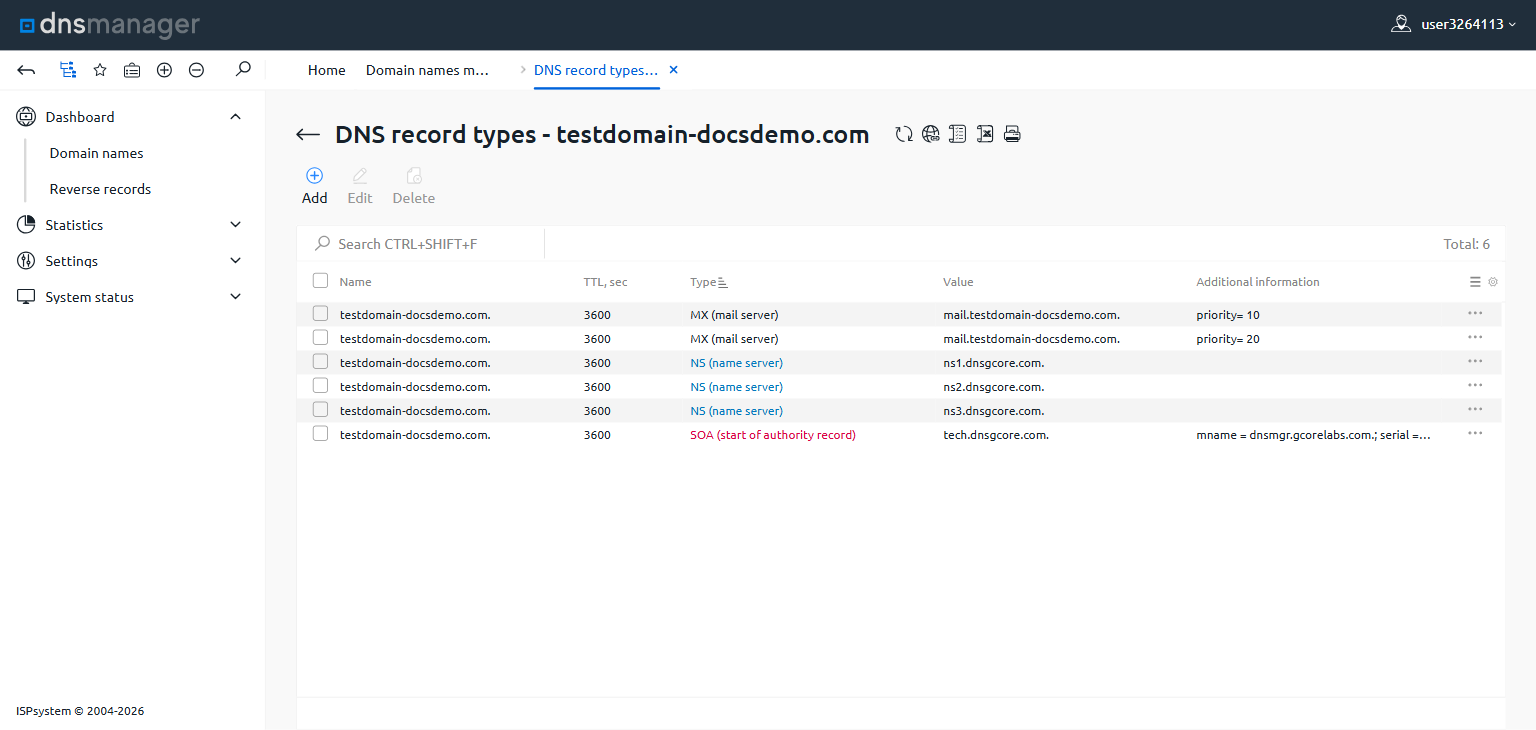
DNS records list with Add button
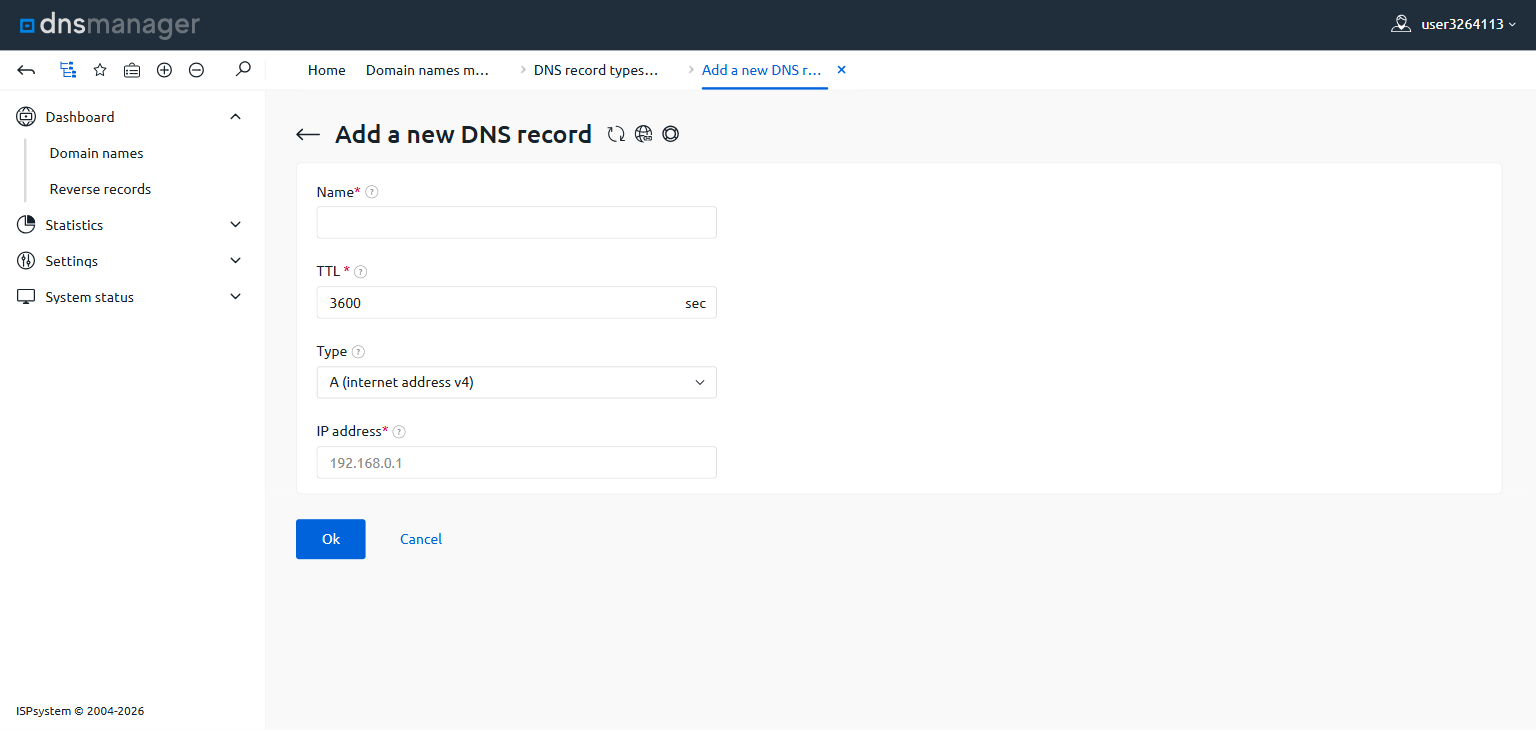
  1. Configure the new record:
Add a new DNS record form
Name: Enter a subdomain, excluding the main domain. TTL: Time in seconds for which resolvers cache the record. Type: Specify the type of record. Additional fields: Fill in the fields that appear based on the record type — an A record requires an IP address, a PTR record requires a domain name.
  1. Click OK.
The record appears in the domain’s DNS records list.