

Copy from external storage
If the source file is available at a public HTTP, HTTPS, or SFTP URL, Gcore downloads it server-side. Supported protocols:- HTTP/HTTPS from external video hosting services (Vimeo, Mux)
- HTTP/HTTPS from S3-compatible storages (AWS S3, Azure Blob Storage)
- SFTP
- Valid:
https://demo-files.gvideo.io/gcore.mp4(13.8 MB from S3) - Valid SFTP:
sftp://login:password@domain.com/path/file.mp4 - Invalid (HLS):
https://demo-files.gvideo.io/hls/master.m3u8
POST /streaming/videos with the source URL in the origin_url attribute:
origin_url that points to a reachable copy of the source file, optionally with clip_start_seconds and clip_duration_seconds to copy only a fragment. The copy gets a new video ID and playback URL, and it’s transcoded again. The same request works across accounts, as long as Gcore can reach the source URL.
The source file of an existing video can’t be replaced. origin_url is set only when the video is created, with POST /streaming/videos or the batch endpoint. After that the field is read-only, and an update request ignores a new value. To publish a new version of a video, create a new video and point the player to the new ID, or keep a stable alias in the application that maps to the current video ID.
Download behavior
For an HTTP or HTTPS source, Gcore attempts to download the file three times and expects a200 OK response. If the attempts fail, the video status becomes error and the error field contains the details. Delete that video and create a new one with a correct URL.
If the download succeeds, Gcore starts transcoding the video. Check transcoding progress via the GET /streaming/videos/ endpoint or webhook notifications.
Upload from a local device
For uploads from a backend server or from a browser or mobile app, Gcore uses the TUS resumable upload protocol. TUS splits the file into segments and resumes from the last successful segment if an interruption occurs. The upload process consists of three steps.Step 1. Create a video entity
SendPOST /streaming/videos without the origin_url attribute to create a video entity and receive its ID and client_id:
id and client_id — both are required in Step 3.
Step 2. Get TUS session parameters
Use theid from Step 1 to request the TUS upload server URL and session token:
servers— available upload servers; use any server whereactiveistrue.token— session token valid for 4 hours. Once the TUS session starts, the token is no longer needed.video— a copy of the video entity data.
Step 3. Upload via TUS
Use the values collected from Steps 1 and 2 as the TUS client configuration:- Header fields must be comma-separated.
- All values are Base64-encoded.
- All keys are unique.
token, video_id, and client_id to test the TUS upload flow:
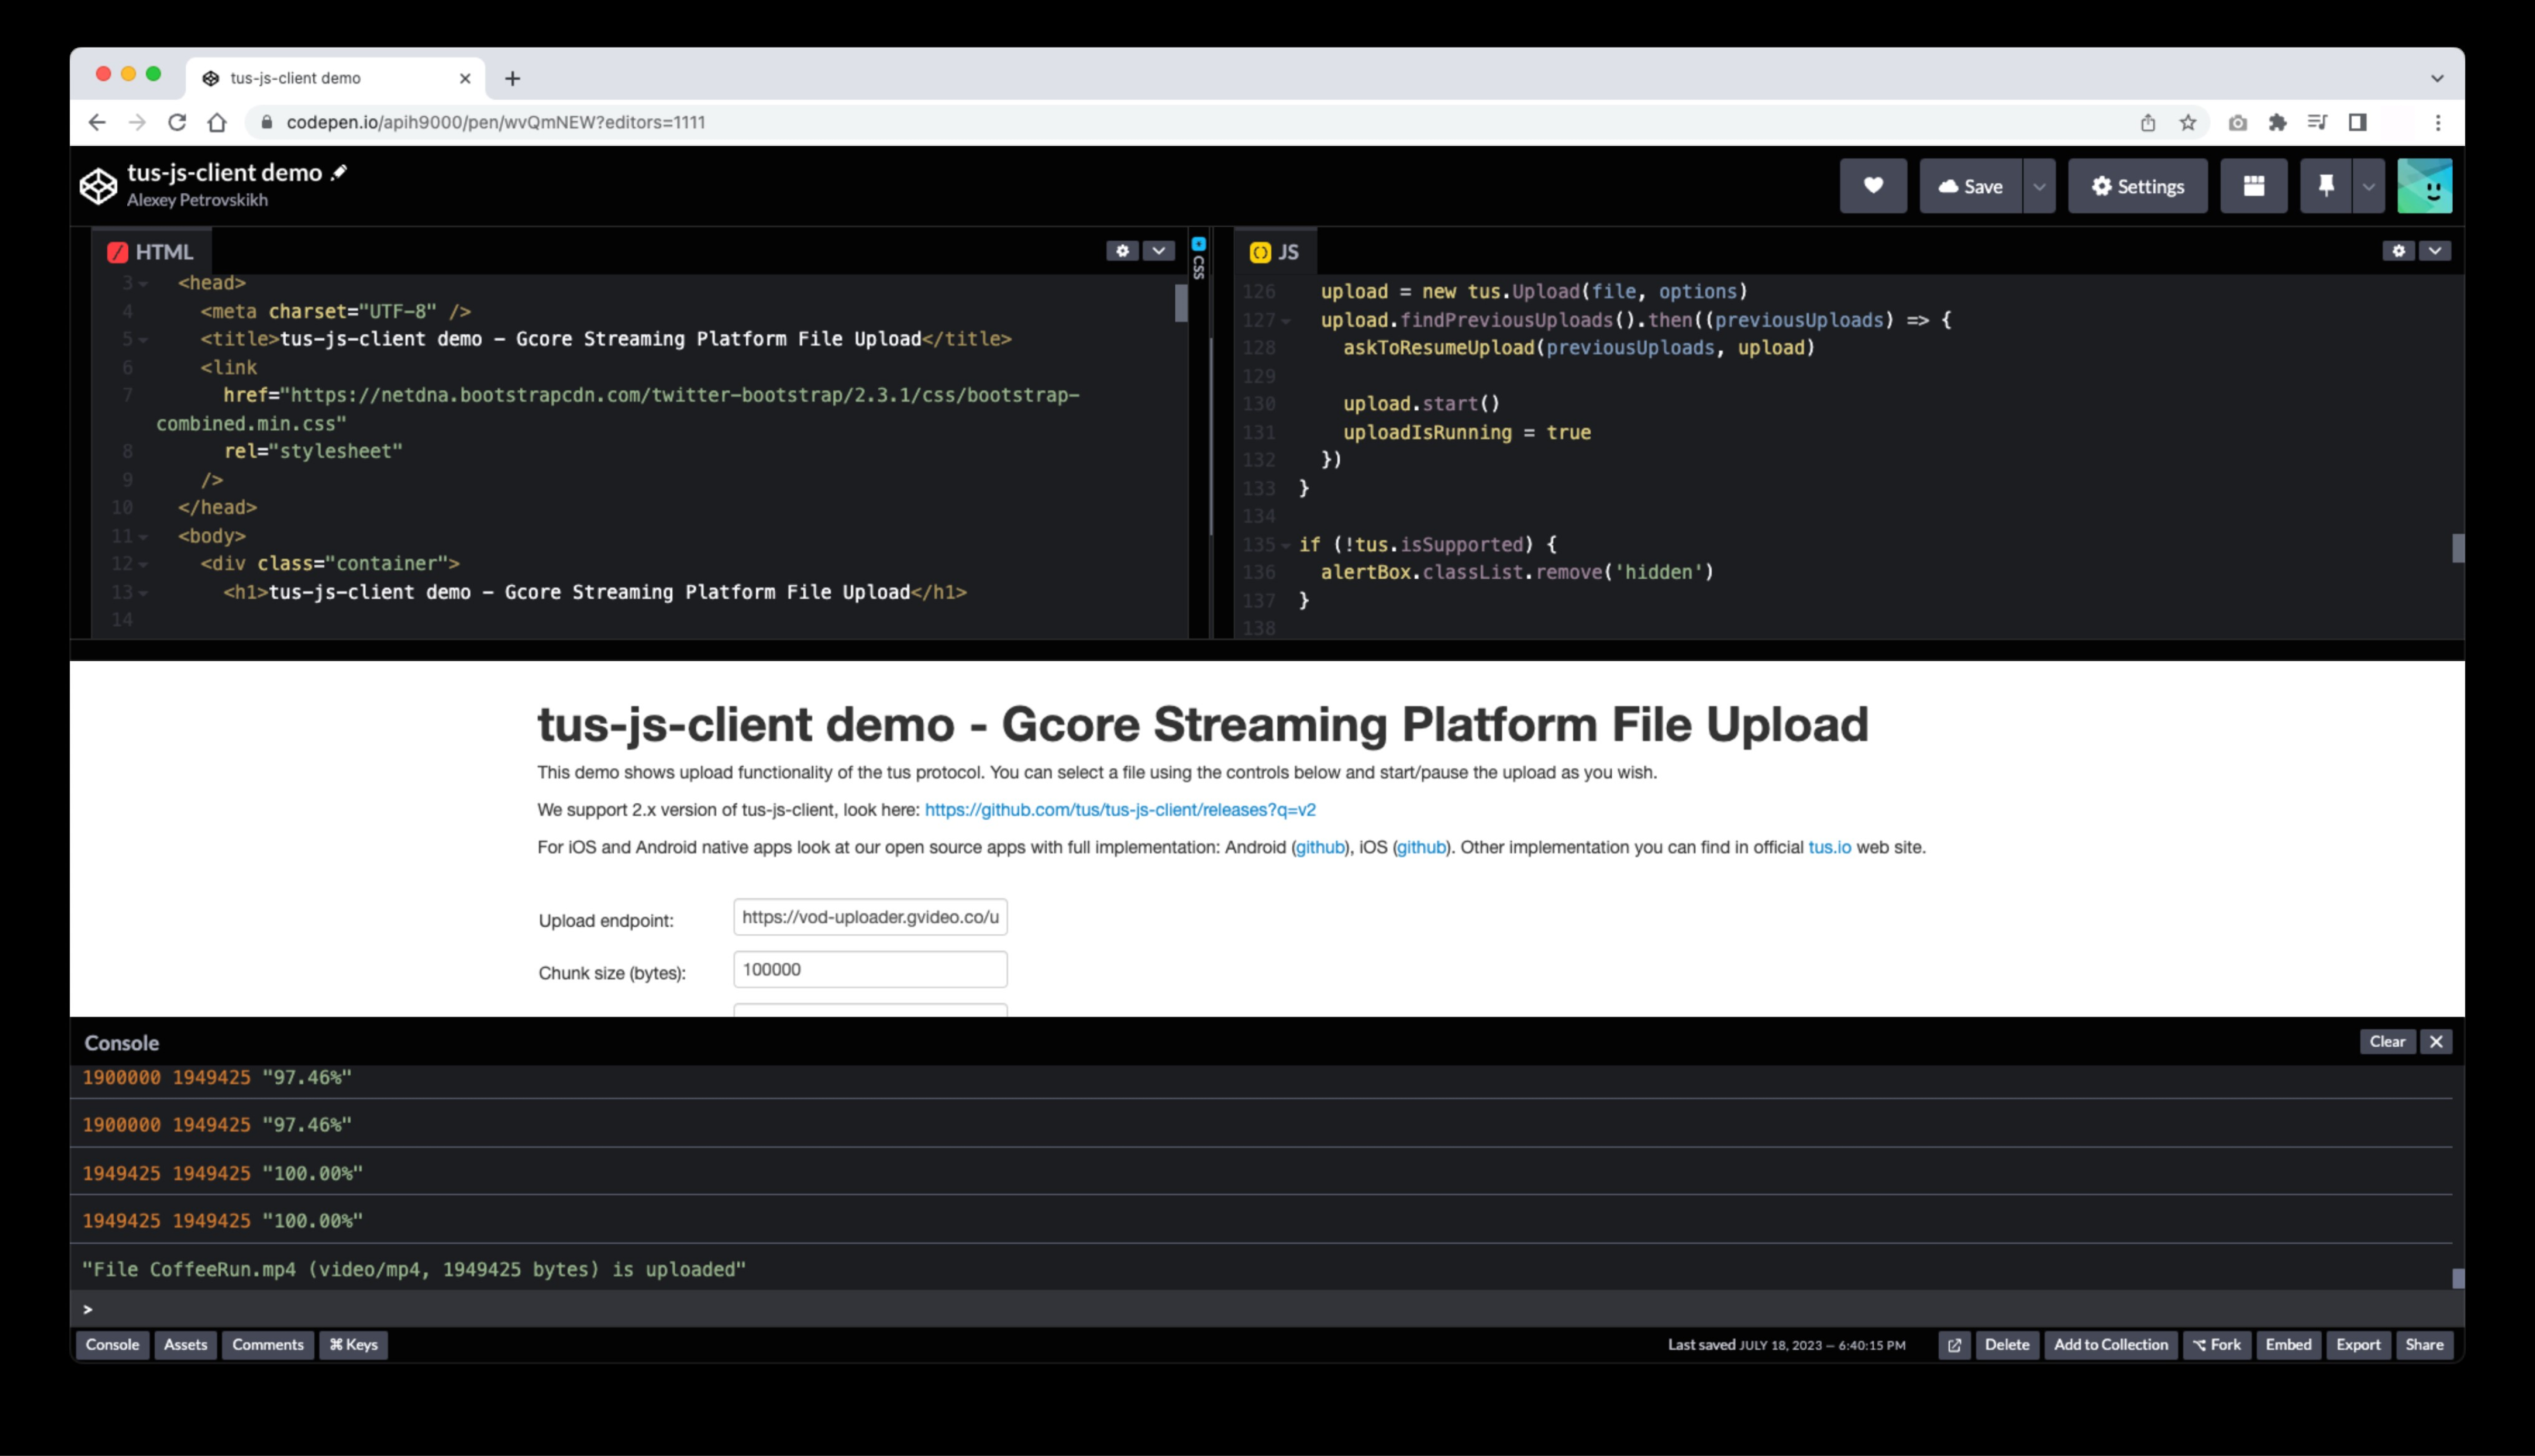
- JS: tus-js-client v2.x — GitHub
- Android: Gcore’s open-source Kotlin demo app
- iOS: Gcore’s open-source Swift demo app
- Other: tus.io/implementations
TUS error reference
Common errors returned by the TUS upload server and their causes:HTTP 405 Method Not Allowed— unexpected response when creating the upload session; check the request parameters.HTTP 429 Too Many Requests— retry the request after a delay.HTTP 500 Internal Server Error:token invalid (null)— check parameter format, Base64 encoding, and key-value separation.token invalid (eyJhbGciOi...)— same as above.token video (12345) does not match this video (23456)—video_idmismatch; do not retry.token client (123) does not match this client (234)—client_idmismatch; do not retry.
Optional upload settings
The following parameters can be included in anyPOST /streaming/videos request body to configure transcoding behavior at upload time.
Processing priority
Every uploaded video enters a transcoding queue. Two priority levels influence scheduling:- Global priority — managed automatically by the system at the infrastructure level and is not user-configurable.
- Account priority — applied within an account, controlled via the
priorityfield.
priority field to adjust scheduling order for transcoding tasks within an account:
- Type: integer
- Range: -10 to 10
- -10 — lowest priority (processed after other jobs)
- 0 — default
- 10 — highest priority (processed first)
Poster and screenshots
Every video gets five automatic screenshots in the screenshots field, spread across the video, including recordings, copies, and videos created from clips. They are generated even when transcoding ends in error, and screenshot_id selects the default one. The index in screenshots and screenshot_id is zero-based, while the numbers in the screenshot URLs are one-based, so the first screenshot in the array is the URL that contains _1_.
The example shows the five screenshots of one video. The default is screenshots[0], and it is black because the video opens on a black frame.
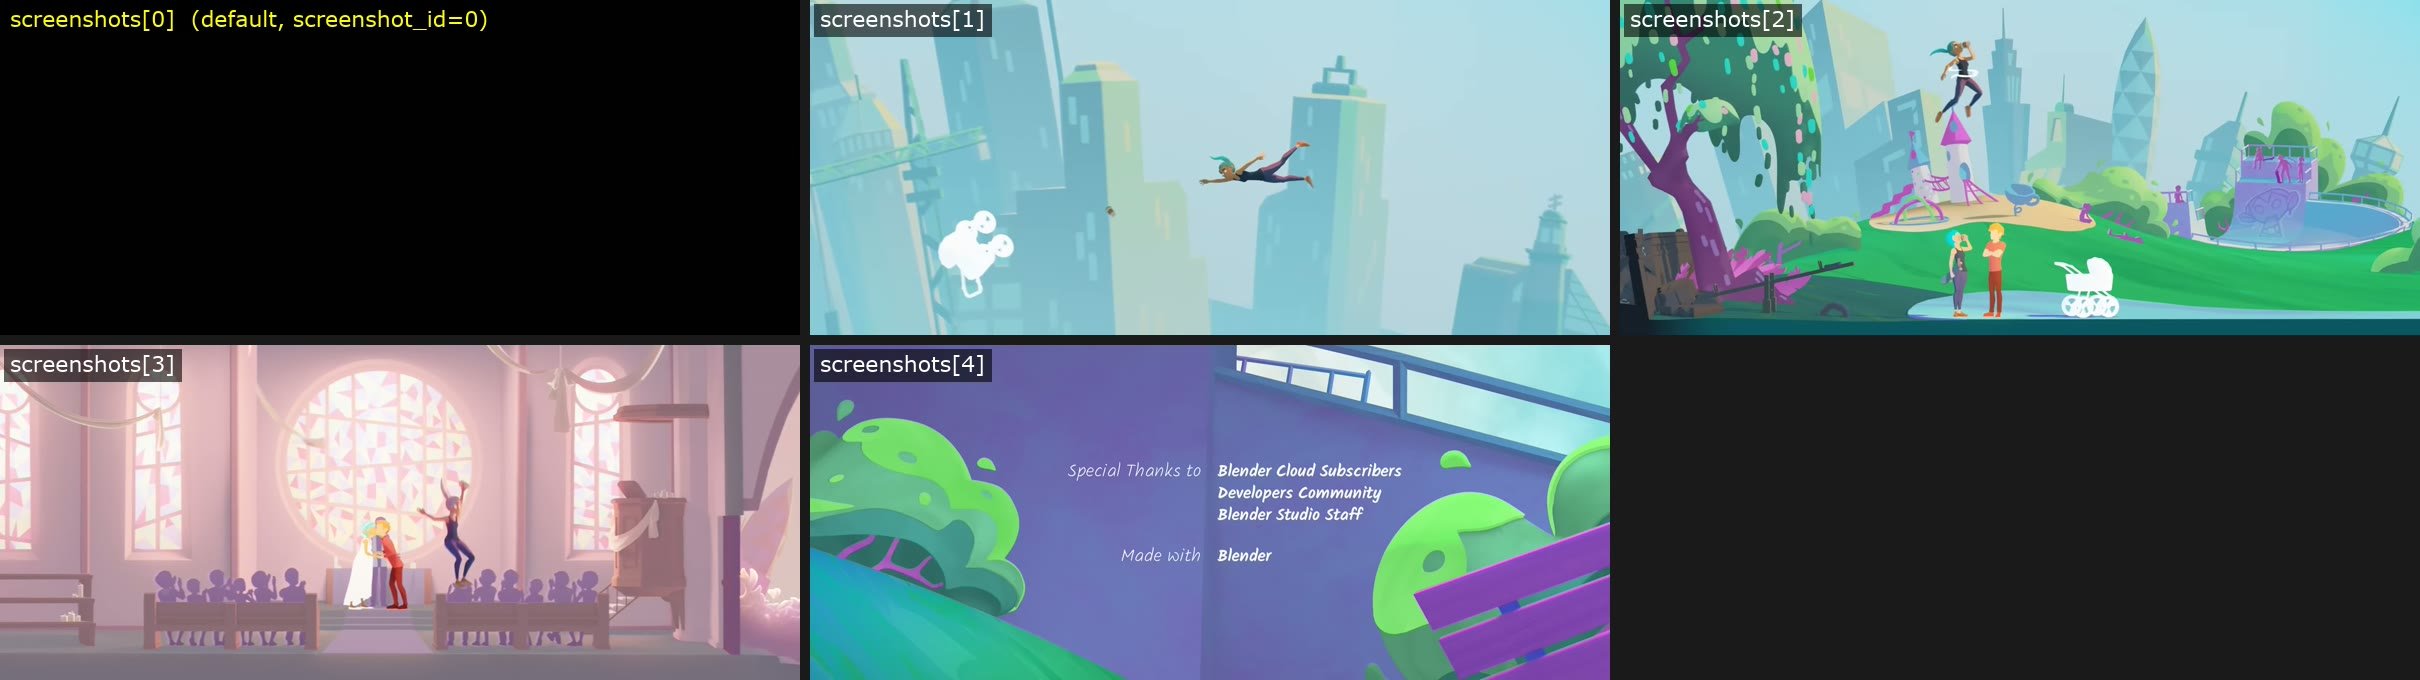
The first screenshot is taken at the start of the video, so it is black when the video starts from a black image. If the default screenshot isn’t suitable as a thumbnail, set screenshot_id to another screenshot or upload a custom poster.
A custom poster is optional. Pass the image in poster as a base64 string, or pass a URL in remote_poster_url. The image must be JPEG, WebP, or PNG, up to 1 MB. Set screenshot_id to -1 to use the custom poster instead of a screenshot, and set remove_poster to true to remove it. While a poster is set, selecting another screenshot with screenshot_id doesn’t change the thumbnail, so remove the poster first.
AI subtitles
AI-generated subtitles can be created automatically at upload time by adding two parameters to the request body:auto_transcribe_audio_language— transcribes the audio track into subtitles. Set toautofor language detection, or specify a language code such asenorfr.auto_translate_subtitles_language— translates the transcribed subtitles into additional languages. Set todefaultfor the account language, or provide a comma-separated list of language codes.
Batch migration
The batch endpointPOST /streaming/videos/batch creates many videos in one aggregated request instead of one request per file, so a large library moves in a few calls. The videos array holds one object per video with the same fields as a single POST /streaming/videos request, including origin_url, priority, and optional subtitles. Videos from one request enter the transcoding queue in order of priority.
- 500 videos per request
- 64 MB request body
- 30 s API connection timeout
- Google Drive
- Amazon S3 — enable public access, then list objects to get URLs
- Vimeo
- Mux
- Dropbox
- Gcore Object Storage or SFTP
Batch migration example
This example shows how to run a batch migration correctly: one request creates the videos in a new directory, downloads each poster by URL, and attaches English subtitles to one video. Gcore prepared a demo bucket with public HTTP access, so the same steps can be run as they are to test batch migration, and the same flow applies to a real library after the URLs are replaced. The demo buckethttps://demo-files.gvideo.io/bucket/ holds four Blender Studio open movies. Every video is a 720p H.264 MP4, every poster is a JPEG under the 1 MB poster limit, and the files are public, so no origin_http_headers are needed:
Step 1. Check the source files
Gcore downloads videos and posters from their URLs, so every file must be reachable without authentication. Posters must be JPEG, WebP, or PNG, up to 1 MB each. AHEAD request shows the status and size of each file:
200, and each poster reports a content-length below 1048576.
Step 2. Create a directory
A directory keeps the migrated videos together, so the batch can be checked and removed as one unit. SendPOST /streaming/directories:
directory. Take its ID from directory.id:
GET /streaming/directories instead.
Step 3. Download the subtitles
The batch endpoint takes the subtitle text inside the request instead of a URL, so the.vtt file is downloaded first:
Step 4. Build the batch request
Each object in thevideos array describes one video, and only name is required. The script builds the request from these fields:
build_batch.py:
batch.json:
Step 5. Send the batch request
One request creates all four videos:empty or pending while Gcore downloads and transcodes them.
Step 6. Check the result
The directory lists all four videos with their statuses. Poll it until every video isready or viewable:
GET /streaming/videos/. The origin_url field holds the link.